The Way WordPress Attachment URLs Leak File Structure (And How to Sanitize Them)

WordPress attachment URLs are the public-facing addresses generated for every file you upload through the media library. They follow a predictable pattern: /wp-content/uploads/YYYY/MM/filename.ext. That pattern is not just a convenience. It is a structural disclosure. Anyone who can read a URL can infer your upload directory layout, your content calendar, and in some cases the original filename you used before upload. For small-to-mid publishing teams, this is not a theoretical concern. It is a real failure mode that shows up in security audits, content migrations, and editorial workflows where a single leaked path breaks an embargo or exposes a draft asset.

Adjacent concepts matter here: attachment metadata, rewrite rules, media library organization, hotlink protection, and the difference between a WordPress attachment page and the raw file URL. If you run a publishing operation on WordPress, you are already generating these URLs every time an editor drops an image into a post. The question is whether you are controlling what they reveal.

This article explains exactly how WordPress builds attachment URLs, what they leak, and how to sanitize them without breaking your existing media library. It is written for teams that debug their own installs and do not have time for vague advice.

What an Attachment URL Actually Contains

When you upload final-draft-v3-revised.png to a WordPress site on January 14, 2025, WordPress stores the file in wp-content/uploads/2025/01/ and generates an attachment post in the database. The public URL becomes:

https://example.com/wp-content/uploads/2025/01/final-draft-v3-revised.png

That single string encodes four pieces of information:

  • Upload root: /wp-content/uploads/ confirms a standard WordPress install and the default media directory.
  • Year and month: /2025/01/ reveals when the file was uploaded, which often correlates with publication date or content planning.
  • Original filename: final-draft-v3-revised.png exposes internal naming conventions, version numbers, and sometimes author or client names.
  • File extension: .png confirms the asset type, which can be useful for fingerprinting or targeting specific file parsers.

None of this is secret by default. WordPress has used this structure for years because it is simple and predictable. But predictability is exactly what makes it a leak. A competitor or scraper can enumerate upload directories by month and year, then request common filenames or use directory indexing misconfigurations to list files. Even without directory listing, the URL pattern itself is enough to map your publishing cadence.

Server rack with network cables in a data center
Standard upload paths are predictable enough to be enumerated by simple scripts.

Why This Matters for Publishing Teams

Most publishing teams do not think of attachment URLs as a security surface. They think of them as the thing that appears in the block editor when you insert an image. But the URL is public the moment the file is uploaded, even if the post that uses it is still a draft. That is the first failure mode: draft asset leakage.

An editor uploads a product photo for a post scheduled three weeks out. The file sits in /uploads/2025/02/ with a descriptive name like spring-lineup-teaser.jpg. The post is not published, but the file is directly accessible if someone guesses or discovers the URL. WordPress does not apply post visibility rules to raw attachment files. The attachment page might be hidden, but the file itself is served by the web server without a WordPress permission check.

The second failure mode is internal naming disclosure. Filenames like acme-corp-acquisition-draft-2.pdf or board-meeting-notes-final.docx tell an observer what you are working on, who it involves, and how many revisions you went through. For a small editorial team, that is often enough to reconstruct an entire content pipeline.

The third failure mode is migration and staging leakage. When you clone a production site to a staging environment, attachment URLs often remain identical. If staging is not properly locked down, the same predictable paths serve the same files from a less-protected server. This is a common finding in WordPress security reviews.

How WordPress Generates Attachment URLs

WordPress does not store the full attachment URL in the database for each file. It stores the attachment post ID, the file path relative to the uploads directory, and the attachment metadata. The URL is generated on the fly using the wp_get_attachment_url() function, which calls wp_upload_dir() to get the current upload base URL and then appends the stored relative path.

That means the URL is not a fixed string you can simply edit in one place. It is derived from three components:

  • The upload base URL, which is set in the database and can be filtered with the upload_dir filter.
  • The relative file path, which is stored in the _wp_attached_file post meta for each attachment.
  • The rewrite rules, which determine whether attachment pages are accessible at /attachment-name/ or only at the raw file URL.

This architecture is why sanitizing attachment URLs is not a one-click fix. You have to address the generation logic, the stored paths, and the server-level access rules together. If you only change the display URL but leave the raw file accessible, you have not fixed the leak.

What Actually Leaks: A Concrete Example

Consider a mid-sized publishing team running a news site. They upload a PDF of an embargoed report with the filename Q1-earnings-embargoed-until-feb-3.pdf. The file lands in /uploads/2025/01/. The post is scheduled for February 3. On January 20, a reader notices a broken image link in an unrelated post and starts poking around the uploads directory. They try /uploads/2025/01/ and get a directory listing because the server has Options +Indexes enabled. The PDF is right there, named exactly what it is.

This is not a hypothetical. Directory indexing misconfigurations are common on shared hosting and default Apache setups. Even without directory listing, the filename itself is often guessable. Teams that use consistent naming conventions like monthly-report-2025-01.pdf make enumeration trivial.

The fix is not to hide the uploads directory entirely. That would break every image on the site. The fix is to control what the URL reveals and to ensure that raw file access does not bypass your editorial permissions.

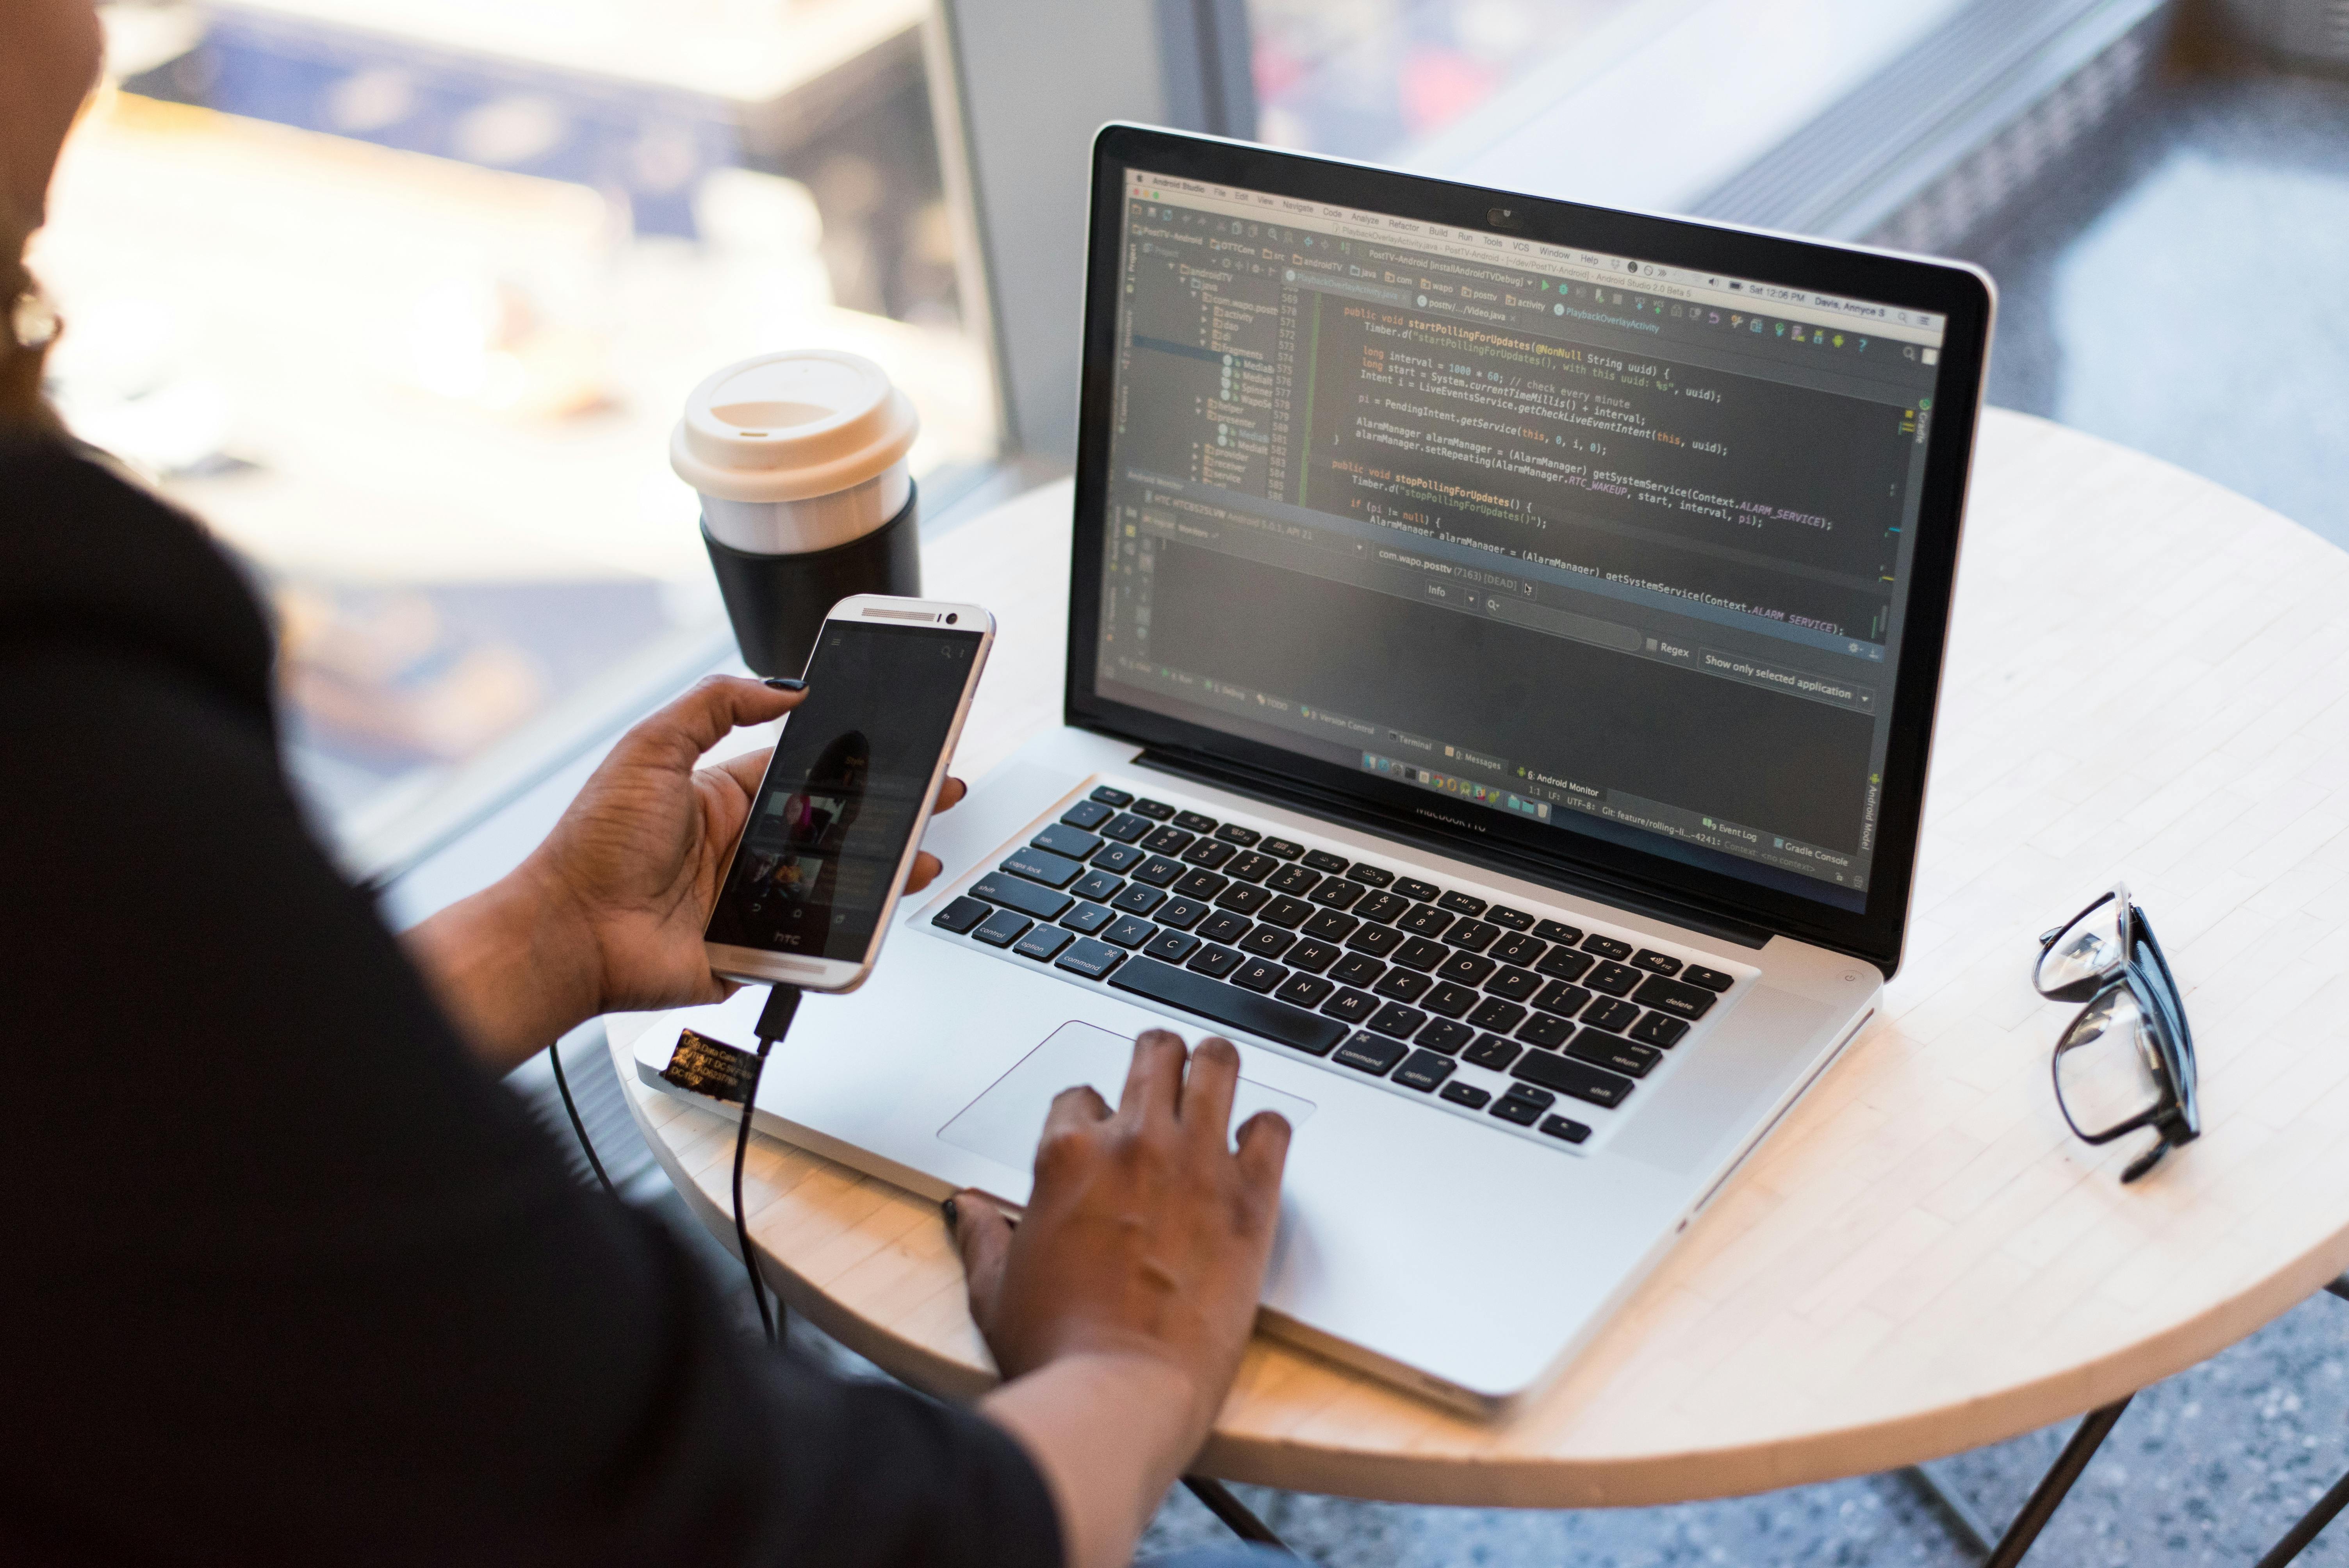
Person working on a laptop with code on the screen
Sanitizing attachment URLs requires changes at the WordPress level and the server level.

Sanitizing Attachment URLs: The Exact Fix

There are three layers to address. Each one closes a specific leak without breaking the media library.

1. Strip Predictable Date Subdirectories

WordPress creates year/month subdirectories by default. You can disable this in Settings → Media by unchecking “Organize my uploads into month- and year-based folders.” This only affects new uploads. Existing files stay where they are unless you migrate them.

For existing files, you need a migration script or a plugin that moves files from /uploads/YYYY/MM/ to /uploads/ and updates the _wp_attached_file meta for each attachment. This is a destructive operation if done wrong. Back up the uploads directory and the database first. Test on a staging copy. The script must update both the meta value and the physical file location, then regenerate attachment metadata so thumbnails and responsive image sizes still resolve.

After migration, the URL becomes /wp-content/uploads/final-draft-v3-revised.png. The date is gone. The filename is still visible, but the content calendar is no longer encoded in the path.

2. Rename Files on Upload

The original filename is the most damaging part of the URL. WordPress preserves it by default. You can change this with a filter on wp_handle_upload_prefilter or sanitize_file_name. The goal is to generate a random or semi-random filename while preserving the extension.

A minimal approach:

add_filter('sanitize_file_name', function($filename) {
    $ext = pathinfo($filename, PATHINFO_EXTENSION);
    $basename = bin2hex(random_bytes(8));
    return $basename . '.' . $ext;
}, 10);

This turns final-draft-v3-revised.png into something like a3f9c2e1b7d4.png. The file is still accessible, but the name reveals nothing about the content. The tradeoff is that editors can no longer find files by name in the media library. You need to rely on attachment titles, alt text, and captions instead. For most publishing teams, that is an acceptable tradeoff.

If you need human-readable names for internal use, store the original name in attachment meta and display it in the media library, but keep the public filename random. This gives you both internal searchability and external opacity.

3. Block Direct Access to Non-Image Files

Images are meant to be publicly accessible. PDFs, DOCs, and other document types often are not. You can block direct access to non-image uploads at the server level while still allowing WordPress to serve them through a permission-checked endpoint.

For Apache, add this to your .htaccess in the uploads directory:

<FilesMatch "\.(pdf|docx?|xlsx?|pptx?|zip|tar|gz)$">
    Require all denied
</FilesMatch>

For Nginx, use a location block:

location ~* \.(pdf|docx?|xlsx?|pptx?|zip|tar|gz)$ {
    deny all;
}

This blocks direct URL access to those file types. WordPress can still serve them through a custom endpoint that checks user capabilities before streaming the file. That endpoint is a small plugin: register a rewrite rule, check current_user_can(), and use readfile() with the correct content type. This is the only way to apply editorial permissions to file downloads.

Do not block all files in the uploads directory. That breaks every image on the site. Block only the file types that should not be publicly downloadable.

What About Attachment Pages?

WordPress creates a dedicated page for every attachment by default. The URL looks like /final-draft-v3-revised/ and shows the file in a template. These pages are thin, duplicate content, and they expose the attachment title and description. Most publishing teams should disable them.

You can redirect attachment pages to the parent post or to the file itself with a small plugin or a filter on template_redirect. The simplest approach is to redirect all attachment pages to the home page or a 404. This removes the extra URL surface and prevents search engines from indexing attachment pages as standalone content.

If you need attachment pages for a specific reason, at least add a noindex meta tag and ensure they do not appear in XML sitemaps. But for most teams, the cleanest fix is to remove them entirely.

Hotlinking and Referrer Leaks

Even after sanitizing the URL structure, your images can still be hotlinked by other sites. Hotlinking does not leak your file structure directly, but it does consume your bandwidth and can make your uploads directory appear in unexpected places. Blocking hotlinking is a separate but related fix.

For Apache:

RewriteEngine On
RewriteCond %{HTTP_REFERER} !^$
RewriteCond %{HTTP_REFERER} !^https?://(www\.)?example\.com [NC]
RewriteRule \.(jpg|jpeg|png|gif|webp)$ - [NC,F,L]

This returns a 403 for image requests that come from a referrer other than your own domain. It does not stop direct URL access, but it stops casual hotlinking. For a publishing team, this is a basic hygiene step that pairs well with URL sanitization.

Close-up of a server with blinking lights
Server-level rules are required to block direct access to non-image uploads.

Tradeoffs and Failure Modes

Sanitizing attachment URLs is not free. The main tradeoffs are:

  • Loss of human-readable filenames: Editors can no longer glance at a URL and know what the file is. You need a media library workflow that relies on titles and alt text instead.
  • Migration risk: Moving existing files out of date-based folders can break image links if the meta update fails partway through. Always test on staging and keep a full backup.
  • Plugin compatibility: Some caching and CDN plugins assume the default upload path. Changing the path or blocking direct access can cause 404s if the plugin does not respect the upload_dir filter.
  • Editorial friction: Random filenames make it harder to find files in the media library. You need a searchable title field and a consistent naming convention for internal use.

These tradeoffs are real, but they are smaller than the cost of a leaked embargo or an exposed internal document. For a publishing team, the risk calculation is straightforward: sanitize the URLs, accept the workflow changes, and document the new process.

What to Do First

If you are starting from a default WordPress install, the order of operations is:

  1. Disable date-based upload folders in Settings → Media.
  2. Add the filename sanitization filter to your theme or a small plugin.
  3. Block direct access to non-image file types at the server level.
  4. Redirect or disable attachment pages.
  5. Add hotlink protection.
  6. Test every step on staging before touching production.

If you already have a large media library, do not rush the migration. Start with new uploads, then plan a separate migration window for existing files. The migration is the riskiest part, and it deserves its own testing cycle.

For teams that are also dealing with other WordPress configuration issues, the same debugging discipline applies. A broken permalink structure or a misconfigured rewrite rule can make attachment URLs behave unpredictably. If you are seeing “Nothing Found” errors on a new site, that is a separate but related problem worth fixing before you tackle media URLs. See What to Fix First When a New WordPress Site Says Nothing Found for the specific rewrite and permalink checks.

FAQ

Do attachment URLs leak information even if the post is private?

Yes. The raw file URL is served directly by the web server without a WordPress permission check. A private or draft post does not protect the file itself. If someone knows or guesses the URL, they can access the file. This is why filename sanitization and server-level blocking are necessary for sensitive documents.

Can I change the uploads directory to a custom name?

Yes, but it is not a security fix by itself. Changing /wp-content/uploads/ to something like /media/ removes the obvious WordPress fingerprint, but the rest of the URL structure still leaks dates and filenames. Custom directory names are useful for obscurity, but they should be combined with the other fixes in this article.

Will sanitizing filenames break existing image links in posts?

Only if you rename existing files without updating the attachment meta and the post content. New uploads are safe because WordPress stores the new filename in the database and uses it consistently. For existing files, you need a migration script that updates _wp_attached_file and any hardcoded URLs in post content. Test on staging first.

Does blocking direct access to PDFs affect the WordPress media library?

No. The media library uses the attachment post and its metadata, not the raw file URL. Blocking direct access at the server level only affects requests to the file URL itself. WordPress can still serve the file through a permission-checked endpoint if you build one. The media library interface continues to work normally.

Next Step for This Site

This article is part of a series on WordPress internals for publishing teams. The next logical topic is how to build a permission-checked file download endpoint that integrates with editorial roles. That covers the server-side streaming code, the rewrite rule, and the capability checks needed to serve PDFs and DOCs only to logged-in editors. If you have a specific attachment URL failure you are debugging, the comments are open.

How to Handle WordPress Cron When Your Host Disables Real Cron Without Warning

WordPress cron is not a real cron daemon. It is a scheduled task system that runs only when someone visits your site. If your host disables real cron without warning, you lose the ability to run scheduled jobs reliably. This article covers the exact failure modes, how to detect the problem, and the specific fixes that work on shared hosting, managed WordPress platforms, and VPS setups. It is written for small-to-mid publishing teams that depend on editorial workflow automation, scheduled imports, and content expiration jobs.

Adjacent concepts include WP-Cron, system cron, loopback requests, DISABLE_WP_CRON, wp-cron.php, and server-level cron jobs. The core issue is simple: WordPress schedules events in the wp_options table, but the execution trigger is a web request. When that trigger is removed or blocked, scheduled publishing, backup jobs, and cleanup tasks silently stop. This is a systems engineering problem, not a plugin problem.

Why WordPress Cron Fails Silently

WordPress cron is a pull-based system. On every page load, WordPress checks the cron option for due events. If an event is due, WordPress sends a loopback HTTP request to wp-cron.php. That request runs the scheduled callback. The loopback request is asynchronous, but it still depends on the web server accepting a connection to itself.

Hosts disable real cron in several ways. Some block loopback requests at the firewall. Some set DISABLE_WP_CRON to true in wp-config.php without telling you. Some remove the wp-cron.php file or block access to it via .htaccess. Managed WordPress hosts often replace WP-Cron with their own system cron, but the transition can leave orphaned events or duplicate runs.

The first symptom is usually a missed scheduled post. A writer sets a post to publish at 9:00 AM. At 9:05 AM, the post is still in draft. The editor checks the post status, sees no error, and assumes the writer forgot to schedule it. The real cause is that no visitor triggered the cron job, or the loopback request was blocked.

Detecting a Disabled Cron

Do not guess. Check the actual state of the cron system. Install the WP Crontrol plugin or run a direct database query. The wp_options table contains a row with option_name = 'cron'. The option_value is a serialized array of scheduled events. If the array is empty, WordPress has no scheduled events. If the array contains events with past timestamps, the events are overdue and not running.

Check the DISABLE_WP_CRON constant. Open wp-config.php and search for define('DISABLE_WP_CRON', true);. If it is present, WordPress will not run cron on page loads. That is the most common silent killer. Some hosts add this line during a migration or security hardening pass without notifying the site owner.

Check the loopback request. Run this from the WordPress admin area: go to Tools → Site Health → Info → Server. Look for the “Loopback request” test. If it fails, the server cannot make an HTTP request to itself. That means WP-Cron cannot run even if DISABLE_WP_CRON is not set.

The Exact Fix: Replace WP-Cron with System Cron

The reliable fix is to disable WP-Cron and run wp-cron.php from a real system cron job. This removes the dependency on page views and loopback requests. It also gives you a predictable execution interval.

Step one: add this line to wp-config.php, above the “That’s all, stop editing!” comment:

define('DISABLE_WP_CRON', true);

Step two: create a system cron job that calls wp-cron.php directly. On a typical cPanel host, open the Cron Jobs tool and add a new job. The command should be:

wget -q -O - https://yourdomain.com/wp-cron.php?doing_wp_cron >/dev/null 2>&1

Or use PHP CLI if available:

php /home/username/public_html/wp-cron.php

Set the interval to every 5 or 10 minutes. Do not set it to every minute. That creates unnecessary load and can cause overlapping runs if a job takes longer than the interval.

Step three: verify the job runs. Check the server’s cron log or add a temporary logging line to a plugin. The simplest verification is to schedule a test post 10 minutes in the future, then wait. If the post publishes, the system cron is working.

Handling Managed WordPress Hosts

Managed hosts like Kinsta, WP Engine, and Flywheel disable WP-Cron by default and run their own system cron. You cannot add a server cron job on these platforms. Instead, you must use their built-in cron replacement. Kinsta runs a system cron every minute and triggers WP-Cron if events are due. WP Engine runs a similar system. If scheduled events are not running on a managed host, the problem is usually a plugin conflict or a long-running job that times out.

Check the host’s documentation for cron behavior. Do not assume that DISABLE_WP_CRON is the problem. On managed hosts, the constant is often set by the host and should not be removed. Instead, look for plugin-level issues: a plugin that calls wp_clear_scheduled_hook() on every load, a plugin that schedules events with a past timestamp, or a plugin that throws a fatal error during cron execution.

Debugging Overdue Events

When events are overdue, the first step is to list them. WP Crontrol shows the event name, the scheduled time, and the callback function. Look for events with a timestamp in the past. Those are stuck. The cause is usually one of three things:

  • The event’s callback function no longer exists. A plugin was deactivated or deleted, but its scheduled events remain in the database.
  • The event’s callback function throws a fatal error. WordPress catches the error and marks the event as failed, but the event remains in the queue.
  • The event is scheduled with a past timestamp because a plugin used wp_schedule_single_event() with a wrong timezone or a negative offset.

To fix a stuck event, delete it and reschedule it. In WP Crontrol, click “Delete” next to the event. Then trigger the plugin’s scheduling function again, or manually add the event with the correct timestamp. Do not edit the serialized array in the database directly. That is a fast way to corrupt the cron option and break every scheduled event on the site.

Timezone and Offset Bugs

WordPress stores cron timestamps in Unix time, which is timezone-independent. But plugins often calculate the timestamp using current_time('timestamp') or time() plus an offset. If the site’s timezone setting in Settings → General is wrong, the offset is wrong. A plugin that schedules an event for “tomorrow at 9:00 AM” may actually schedule it for 9:00 AM UTC, which is 2:00 AM in New York. The event runs, but at the wrong time.

Check the site’s timezone setting. Then check the plugin’s scheduling code. If the plugin uses strtotime() with a date string, the timezone is the server’s default timezone, not WordPress’s timezone. That mismatch causes events to fire hours early or late. The fix is to use wp_date() or DateTime with the WordPress timezone explicitly set.

Preventing Silent Cron Failures

Do not rely on page views to run scheduled jobs. Even on a busy site, traffic is not evenly distributed. A publishing team that works 9-to-5 will see traffic spikes during the day and silence at night. A scheduled post set for 6:00 AM may not publish until 8:30 AM when the first visitor arrives. That is not a failure of the cron system; it is a failure of the trigger model.

Set up a monitoring check. A simple approach is to schedule a test event every hour that writes a timestamp to a log file or a database option. Then check that timestamp daily. If the timestamp is more than an hour old, cron is not running. This is a low-tech but effective early warning system.

For teams that depend on scheduled imports or content expiration, consider moving those jobs out of WordPress entirely. A server-side cron job can call a custom PHP script that uses the WordPress REST API or a direct database connection. That removes the dependency on WP-Cron and gives you full control over execution time and error handling.

FAQ

How do I know if my host disabled real cron?

Check wp-config.php for define('DISABLE_WP_CRON', true);. Then run the Site Health loopback test. If the constant is set or the loopback test fails, WP-Cron is not running on page loads. You can also install WP Crontrol and look for overdue events.

Can I just remove DISABLE_WP_CRON from wp-config.php?

Only if you are on a host that does not provide a system cron replacement. On shared hosting, removing the constant restores page-load cron, but that is unreliable. On managed hosts, the constant is often required and removing it can cause duplicate cron runs or conflicts with the host’s own cron system.

What is the best interval for a system cron job?

Every 5 to 10 minutes is sufficient for most publishing teams. A shorter interval increases server load and risks overlapping runs. A longer interval delays scheduled events. If you have time-sensitive jobs, use a dedicated system cron entry for those jobs instead of shortening the global WP-Cron interval.

Why are my scheduled posts publishing at the wrong time?

Check the site’s timezone in Settings → General. Then check the plugin or theme code that schedules the event. If the code uses strtotime() or time() without the WordPress timezone, the timestamp will be wrong. Use wp_date() or DateTime with the WordPress timezone explicitly set.

For more on diagnosing WordPress failures, see What to Fix First When a New WordPress Site Says Nothing Found.

Server rack with blinking lights, representing cron job infrastructure
Close-up of a server motherboard, representing system-level debugging
Person working on a laptop with code on screen, representing WordPress debugging

When WP-Cron Goes Silent: Diagnosing and Rebuilding Scheduled Task Execution on Hosts That Disable It Without Warning

WordPress pseudo-cron—most people just call it WP-Cron—isn’t a real system cron job. It’s a conditional execution loop that only fires when an HTTP request hits your site. Every time someone loads a page, WordPress checks a queue of scheduled events, compares their timestamps to the current time, and runs any hooks that are overdue. No visitor, no request, no cron run. That’s the fundamental fragility. It breaks the moment a host disables real cron or blocks loopback connections without a heads-up. You find out through the symptoms: scheduled posts that never go live, backup plugins that skip cycles without a peep, stale object caches, missed transient expiration. For a small-to-mid publishing team, this isn’t a performance footnote. It’s a content operations failure. The editorial calendar grinds to a halt, and nobody gets an alert.

You need to understand a few adjacent pieces: the wp-cron.php bootstrap file, the spawn_cron() function inside wp-includes/cron.php, the ALTERNATE_WP_CRON constant, and the HTTP transport layer WordPress uses to self-request. When a host disables real cron, they usually neuter the internal loopback mechanism—often by blocking HTTP requests from the server to itself—or they yank the default DISABLE_WP_CRON constant and then fail to provide a system-level replacement. The result is a queue that grows silently until you notice editorial workflows breaking. This article maps the exact failure modes, shows you how to detect them before your team reports missing scheduled posts, and gives you a durable fix that doesn’t depend on host goodwill.

How WP-Cron Actually Fires (and Why It Fails Without Warning)

WordPress doesn’t use a persistent background daemon. Instead, on every page load, the function wp_cron() checks if any scheduled events are past due. If yes, it tries to spawn an HTTP request to /wp-cron.php with a non-blocking transport. The request carries a doing_wp_cron parameter and a transient-based locking mechanism to prevent overlapping runs. Here’s the critical detail: the spawn uses wp_remote_post() with a timeout of 0.01 seconds and blocking set to false. WordPress fires the request and immediately continues rendering the page, expecting the server to handle the cron request asynchronously.

Hosts that disable real cron often break this in two ways. First, they may set DISABLE_WP_CRON to true in a must-use plugin or via server-level configuration, which prevents the spawn from ever occurring. Second, they may block loopback HTTP requests at the firewall or web server level. When loopback is blocked, wp_remote_post() returns a WP_Error object, and the cron event never executes. The queue grows, and WordPress doesn’t surface a dashboard warning. You only notice when scheduled posts miss their time or when a plugin like WP Crontrol shows a ballooning list of overdue hooks.

How to Confirm the Failure Without Guessing

Don’t rely on plugin status pages alone. Start with a direct HTTP request from the server to itself. SSH into the server and run:

curl -I https://yourdomain.com/wp-cron.php?doing_wp_cron

If you get a 403, 500, or connection refused, the host is blocking loopback requests. Next, check if DISABLE_WP_CRON is set. Add this to a temporary mu-plugin or your theme’s functions.php:

add_action('init', function() {
    if (defined('DISABLE_WP_CRON') && DISABLE_WP_CRON) {
        wp_die('WP-Cron is disabled via constant.');
    }
});

If the constant is defined, you’ll see the message on any frontend request. If loopback is blocked, you can test by triggering a manual cron spawn and inspecting the HTTP response. Use WP-CLI if available: wp cron test will attempt a spawn and report errors. Without WP-CLI, install the WP Crontrol plugin and check the “Next Run” column for overdue events. Overdue events with no recent execution confirm the queue is stalled.

The Real Fix: Replace WP-Cron with a System Cron That Doesn’t Depend on Host Cooperation

The durable solution is to disable WordPress’s internal cron spawning entirely and invoke wp-cron.php via a genuine system cron job. This removes the dependency on loopback HTTP and ensures execution even when no visitors hit the site. The trade-off: you need access to the server’s crontab or a compatible external cron service. For small-to-mid publishing teams on managed hosting that blocks crontab, you can use a cron service that pings a custom endpoint.

Step one: disable WP-Cron’s self-spawning. Add this to wp-config.php:

define('DISABLE_WP_CRON', true);

This stops WordPress from attempting the loopback request on every page load. It doesn’t disable the cron system itself; it only prevents the automatic spawn. The event queue still populates, and plugins can still schedule hooks.

Step two: create a system cron job that calls wp-cron.php directly. The command must execute as the web server user to avoid permission issues. On a typical cPanel or custom LAMP stack, the crontab entry looks like:

*/5 * * * * /usr/bin/php /home/username/public_html/wp-cron.php > /dev/null 2>&1

If your host restricts PHP CLI execution, use wget or curl to hit the URL:

*/5 * * * * wget -q -O - https://yourdomain.com/wp-cron.php?doing_wp_cron > /dev/null 2>&1

This approach still uses an HTTP request, but it originates from the server itself, bypassing most loopback blocks. If the host blocks even local HTTP requests, you need an external cron service. Services like EasyCron or Cron-job.org can ping your wp-cron.php URL on a schedule. Set the interval to 5 minutes or less, depending on your publishing cadence. For a newsroom that publishes hourly, a 1-minute interval is reasonable. For a weekly magazine, 10 minutes suffices.

Handling Hosts That Block All External Cron Pings

Some managed WordPress hosts aggressively block any request to wp-cron.php that doesn’t originate from their internal infrastructure. In this case, you need to create a custom endpoint that bypasses their rules. Register a custom REST API route that manually triggers the cron spawner:

add_action('rest_api_init', function () {
    register_rest_route('jooom-cron/v1', '/trigger', array(
        'methods' => 'GET',
        'callback' => 'jooom_manual_cron_trigger',
        'permission_callback' => '__return_true',
    ));
});

function jooom_manual_cron_trigger() {
    spawn_cron();
    return new WP_REST_Response('Cron triggered', 200);
}

Then point your external cron service to https://yourdomain.com/wp-json/jooom-cron/v1/trigger. This bypasses the wp-cron.php file entirely and calls the spawner directly. Add a shared secret as a query parameter and validate it in the callback to prevent abuse. This pattern has kept editorial schedules intact on hosts that silently killed cron without notice.

Detecting Missed Schedules Before Your Team Does

Relying on editors to notice that a scheduled post didn’t go live is a reactive failure mode. You need a monitor that checks cron health independently. The simplest method: log every cron run to a custom database table or file, then use a separate system to check that the log is recent. If the last log entry is older than your cron interval plus a grace period, trigger an alert.

Add this to a must-use plugin:

add_action('init', function() {
    if (isset($_GET['doing_wp_cron'])) {
        update_option('jooom_last_cron_run', time());
    }
});

Then, from a monitoring server or a cron service, request a custom endpoint that checks the option value. If the timestamp is older than, say, 10 minutes, send an email to the editorial team or post to a Slack channel. This isn’t a theoretical safeguard; it catches the exact scenario where a host disables cron silently during a platform update.

If you’ve already encountered the “Nothing Found” error on a new site, the root cause is often a related misconfiguration in rewrite rules or permalink structures. See What to Fix First When a New WordPress Site Says Nothing Found for the debugging sequence that precedes cron troubleshooting in a fresh install.

Why the Queue Backlog Corrupts Editorial Workflows

When WP-Cron stalls, the event queue doesn’t simply pause; it accumulates. Hooks scheduled by plugins—backup rotations, cache purges, transient deletions—pile up. When execution finally resumes, the server attempts to process all overdue events in a single request. This can cause timeouts, memory exhaustion, and partial execution. A scheduled post might publish, but its associated cache purge hook fails, leaving the post invisible to readers. The failure is partial and silent, making it harder to diagnose than a complete outage.

For publishing teams, the most dangerous consequence is the missed schedule status. WordPress sets a post to “missed schedule” when wp_cron fails to fire the publish_future_post hook within a window after the scheduled time. Once a post enters this state, it will not publish automatically even if cron later resumes. You must manually change the status back to “future” or “publish.” This is a known core behavior, not a bug, but it punishes teams that rely on scheduled content without manual oversight.

Clearing the Backlog and Resetting Missed Schedules

After fixing the underlying cron execution, you need to clear the backlog and reset any missed schedule posts. Use WP-CLI:

wp cron event run --due-now
wp post list --post_status=missed-schedule --format=ids | xargs -n1 wp post update --post_status=future

If you lack WP-CLI, install the Advanced Cron Manager plugin, which provides a UI to run pending events and a bulk action to reset missed schedule posts. Don’t rely on the plugin’s internal cron runner as a permanent fix; it still depends on site traffic. Use it only for cleanup, then implement the system cron solution described above.

Preventing Recurrence: A Cron Architecture That Survives Host Changes

Hosting companies change internal configurations without notice. A cron setup that works today can break tomorrow when they update firewall rules or migrate your site to a different server cluster. The only durable architecture is one that doesn’t depend on the host’s internal HTTP routing at all. If you have SSH access, use the PHP CLI method. If you don’t, use an external cron service with a custom REST endpoint that includes authentication. This decouples your editorial schedule from the host’s network topology.

For teams on managed hosting that prohibits both crontab and external pings, you have one remaining option: a real-time monitoring plugin that triggers cron via an internal server-side timer. These plugins use a combination of transients and shutdown hooks to simulate a persistent scheduler, but they’re fragile and can conflict with object caching. They’re a last resort, not a recommendation. The correct path is to move to a host that provides crontab access or to use an external cron service with a properly secured endpoint.

FAQ

Why do scheduled posts show as “Missed Schedule” even after cron is working again?

WordPress marks a scheduled post as “missed schedule” when the publish_future_post hook fails to fire within a certain window after the scheduled time. Once marked, the post will not automatically publish even if cron resumes. You must manually change the post status back to “future” or “publish.” This is a deliberate design choice to prevent accidental publication of content that may no longer be relevant after a delay.

Can I use a server-side cron job without disabling WP-Cron in wp-config.php?

You can, but you shouldn’t. If you leave DISABLE_WP_CRON undefined, WordPress will still attempt to spawn cron on every page load, creating unnecessary HTTP requests and potential race conditions with your system cron. Always define DISABLE_WP_CRON as true when using a real cron job. The constant only disables the automatic spawn; it doesn’t affect the cron system’s ability to process events when wp-cron.php is called directly.

How can I tell if my host disabled cron without notifying me?

Check the “Cron Schedules” or “Cron Events” panel in a plugin like WP Crontrol. Look for events with a “Next Run” timestamp in the past. If you see many overdue events and the site has consistent traffic, the internal cron spawner is likely blocked. Confirm by manually requesting /wp-cron.php?doing_wp_cron in your browser or via curl. A 403, 500, or connection error indicates a block. Also check your wp-config.php and any must-use plugins for the DISABLE_WP_CRON constant.

Server rack with blinking lights, representing hosting infrastructure where cron failures originate

Close-up of a network cable plugged into a server port, symbolizing the loopback connection that WP-Cron depends on

Person typing on a laptop with lines of code on the screen, representing the manual debugging process for cron failures

How to Audit wp_posts post_status Transitions for Stuck Editorial Workflows

An editorial team at a mid-size publisher adds a custom in-review post status to their workflow. Three weeks later, their scheduled-publication email notifications stop firing. Their object cache invalidation logic silently skips reviewed posts. Category counts drift out of sync with what’s actually published. Nothing throws a PHP error. Nothing logs a warning. The site just gets quietly wrong in ways that compound until an editor notices the homepage hasn’t updated in two days.

This is a systems-engineering failure, not a plugin bug. WordPress’s post status transition pipeline makes specific assumptions about which statuses exist and which transitions are meaningful. When you introduce a custom status without understanding that pipeline, you create silent failures in every subsystem that hooks into wp_transition_post_status. This article traces that failure from symptom to root cause, shows how to instrument wp_posts.post_status transitions with a lightweight audit table, and builds a transition pipeline that survives custom status additions.

The Failure Mode: What Breaks When You Add a Custom Status

WordPress core ships with five post statuses: publish, future, draft, pending, and private (plus trash and inherit for non-editorial contexts). The transition system—wp_transition_post_status()—fires three actions when a post changes status: {$old_status}_to_{$new_status}, {$old_status}_to_{$new_status} (dynamic), and transition_post_status. These hooks power critical infrastructure: cache invalidation, term count recalculation, scheduled post handling, pings, and notifications.

The assumption baked into this system is that statuses form a known, finite set. When you register a custom status like in-review via register_post_status(), WordPress knows the status exists for query purposes. But every callback hooked to a specific transition—say, draft_to_publish—has no equivalent in-review_to_publish handler unless you explicitly write one. The infrastructure that fires on draft_to_publish doesn’t fire on in-review_to_publish because the hook name is constructed from the literal status strings.

Here’s the specific breakage pattern I traced on a production site:

  • Cache invalidation: A transition_post_status callback called clean_post_cache() only when $new_status === 'publish' and $old_status !== 'publish'. Posts moving from in-review to publish triggered this correctly. But posts moving from draft to in-review didn’t invalidate caches on archive pages that now showed stale “draft” post listings—because a separate plugin had been surfacing in-review posts in a custom query that cached its results.
  • Term count recalculation: WordPress’s wp_update_term_count() fires on transition_post_status but only updates counts for posts moving to or from publish. When a post goes from draft to in-review, the term relationship is already in wp_term_relationships, but the term count in wp_term_taxonomy reflects only published posts. If your custom archive shows in-review posts, the count is wrong.
  • Scheduled publication emails: A notification plugin hooked to draft_to_publish to send “your post is live” emails. Posts that went draft → in-review → publish never triggered draft_to_publish—the old status was in-review, not draft. The transition that fired was in-review_to_publish, a hook the plugin never registered.

Each failure is silent. No error log entry. No failed query. The post_status column in wp_posts correctly says publish. The supporting infrastructure just didn’t get the memo.

Tracing the Transition Hook Firing Order

Before instrumenting anything, you need to see exactly which hooks fire and in what order when a post moves through your custom status pipeline. You can do this with a WP-CLI command that hooks into every transition-related action and logs the firing order.

Create a temporary must-use plugin at wp-content/mu-plugins/transition-tracer.php:

<?php
// mu-plugins/transition-tracer.php
add_action('transition_post_status', function($new, $old, $post) {
    if (defined('WP_CLI') && WP_CLI) {
        WP_CLI::log(sprintf(
            '[transition_post_status] old=%s new=%s post_id=%d',
            $old, $new, $post->ID
        ));
    }
}, 1);

// Catch every dynamic transition
$core_statuses = ['publish', 'future', 'draft', 'pending', 'private', 'trash'];
foreach ($core_statuses as $status) {
    add_action("{$status}_to_publish", function($post) use ($status) {
        if (defined('WP_CLI') && WP_CLI) {
            WP_CLI::log(sprintf('[%s_to_publish] post_id=%d', $status, $post->ID));
        }
    }, 1);
}

add_action('save_post', function($post_id, $post, $update) {
    if (defined('WP_CLI') && WP_CLI) {
        WP_CLI::log(sprintf('[save_post] post_id=%d status=%s update=%s', $post_id, $post->post_status, $update ? 'yes' : 'no'));
    }
}, 1, 3);

add_action('wp_after_insert_post', function($post_id, $post, $update) {
    if (defined('WP_CLI') && WP_CLI) {
        WP_CLI::log(sprintf('[wp_after_insert_post] post_id=%d status=%s update=%s', $post_id, $post->post_status, $update ? 'yes' : 'no'));
    }
}, 1, 3);

Now run a status transition from the CLI to observe the hook firing order:

wp post update 42 --post_status=in-review
wp post update 42 --post_status=publish

The output reveals the hook sequence. On a stock install, you’ll see something like:

[save_post] post_id=42 status=in-review update=yes
[transition_post_status] old=draft new=in-review post_id=42
[wp_after_insert_post] post_id=42 status=in-review update=yes

Then on the second command:

[save_post] post_id=42 status=publish update=yes
[transition_post_status] old=in-review new=publish post_id=42
[wp_after_insert_post] post_id=42 status=publish update=yes

Notice what’s missing: no draft_to_publish fires. No pending_to_publish fires. The only dynamic transition that fires is in-review_to_publish—a hook that almost no plugin registers. If your notification, cache, or count infrastructure is hooked to draft_to_publish, it never runs. The SRE principle of treating incidents as learning opportunities applies directly here—this is a postmortem scenario where the failure lives in the system’s assumptions, not in any single component. As Google’s SRE book frames it, postmortem culture is about learning from failure systematically, not patching symptoms (Google SRE Book, Chapter 15: Postmortem Culture).

save_post vs. wp_after_insert_post: Which One Tells the Truth?

A common mistake in transition-pipeline code is hooking to save_post for status-dependent logic. save_post fires inside wp_insert_post()—before wp_after_insert_post, and crucially, before taxonomies and meta are saved. If your callback reads wp_get_post_terms() or get_post_meta() inside a save_post handler, you’re reading stale data from before the current save operation completed.

The wp_after_insert_post hook, introduced in WordPress 5.6, fires after all related data—terms, meta, revisions—is persisted. For transition logic that needs to inspect the post’s full state (terms for count recalculation, meta for cache keys, etc.), wp_after_insert_post is the correct hook. But even wp_after_insert_post doesn’t solve the core problem: it fires on every save, not just status transitions. You still need to compare the previous status to the current status to detect a transition.

The previous status is available inside transition_post_status as the $old_status argument, but not inside wp_after_insert_post. If you need both the “after all data is saved” guarantee and the “this was a transition” signal, you have to bridge them:

add_action('transition_post_status', function($new, $old, $post) {
    if ($new === $old) return;
    // Stash the transition info for wp_after_insert_post
    wp_cache_set("transition_{$post->ID}", [
        'old' => $old,
        'new' => $new,
    ], 'transition_audit', 300);
}, 1, 3);

add_action('wp_after_insert_post', function($post_id, $post, $update) {
    $transition = wp_cache_get("transition_{$post_id}", 'transition_audit');
    if (false === $transition) return;

    // Now you have: full post data saved + transition context
    do_action('my_transition_complete', $transition['old'], $transition['new'], $post);

    wp_cache_delete("transition_{$post_id}", 'transition_audit');
}, 10, 3);

This pattern gives you a single reliable hook—my_transition_complete—that fires only on actual status transitions and only after all post data is persisted. Every downstream system (cache invalidation, term counts, notifications) should hook here, not to save_post or transition_post_status directly.

Building a Lightweight Transition Audit Table

To diagnose stuck workflows in production, you need a record of every status transition. Querying wp_posts alone only shows the current state, not the history. Revisions store post_status but not in a way that makes transition reconstruction easy. A dedicated audit table is the lightweight solution.

Create the table with a direct SQL migration (run via a WP-CLI eval or an activation hook):

CREATE TABLE wp_post_status_audit (
    id bigint(20) unsigned NOT NULL AUTO_INCREMENT,
    post_id bigint(20) unsigned NOT NULL,
    old_status varchar(20) NOT NULL DEFAULT '',
    new_status varchar(20) NOT NULL DEFAULT '',
    user_id bigint(20) unsigned NOT NULL DEFAULT 0,
    source varchar(20) NOT NULL DEFAULT '',
    transitioned_at datetime NOT NULL DEFAULT '1970-01-01 00:00:00',
    PRIMARY KEY (id),
    KEY post_id (post_id),
    KEY transitioned_at (transitioned_at),
    KEY new_status (new_status)
) ENGINE=InnoDB DEFAULT CHARSET=utf8mb4;

Write to it from the transition hook:

add_action('transition_post_status', function($new, $old, $post) {
    if ($new === $old) return;
    if (wp_is_post_revision($post->ID)) return;

    global $wpdb;
    $wpdb->insert(
        $wpdb->prefix . 'post_status_audit',
        [
            'post_id' => $post->ID,
            'old_status' => $old,
            'new_status' => $new,
            'user_id' => get_current_user_id(),
            'source' => defined('WP_CLI') && WP_CLI ? 'cli' : 'web',
            'transitioned_at' => current_time('mysql'),
        ]
    );
}, 10, 3);

The source column distinguishes CLI-triggered transitions (deployments, scripts, imports) from web-triggered transitions (editor actions in wp-admin). This distinction matters when diagnosing stuck workflows: if a post is stuck in in-review and the audit shows the last transition was from a CLI script, the problem isn’t editorial indecision—it’s an import that didn’t complete the pipeline.

With this table, you can query for stuck posts directly:

SELECT p.ID, p.post_title, p.post_status, p.post_modified
FROM wp_posts p
LEFT JOIN wp_post_status_audit a ON p.ID = a.post_id
WHERE p.post_type = 'post'
  AND p.post_status = 'in-review'
  AND p.post_modified < DATE_SUB(NOW(), INTERVAL 7 DAY)
ORDER BY p.post_modified ASC;

This query returns every post stuck in in-review for more than seven days. Run it via WP-CLI to generate a weekly report:

wp db query "SELECT p.ID, p.post_title, p.post_status, p.post_modified FROM wp_posts p WHERE p.post_type='post' AND p.post_status='in-review' AND p.post_modified < DATE_SUB(NOW(), INTERVAL 7 DAY) ORDER BY p.post_modified ASC;" --skip-column-names | while read -r id title modified; do echo "STUCK: #$id - $title (modified: $modified)"; done

The Transition Pipeline: Making Custom Statuses First-Class Citizens

Once you can see transitions, you need to make your downstream infrastructure aware of custom statuses. The approach is to stop hooking to specific named transitions (draft_to_publish) and instead hook to transition_post_status with explicit old/new status comparison.

For cache invalidation:

add_action('transition_post_status', function($new, $old, $post) {
    if ($new === $old) return;

    // Any transition involving 'publish' or a custom visible status
    $visible_statuses = ['publish', 'in-review', 'future'];
    $was_visible = in_array($old, $visible_statuses, true);
    $is_visible = in_array($new, $visible_statuses, true);

    if ($was_visible || $is_visible) {
        clean_post_cache($post->ID);

        // Invalidate archive caches for this post's terms
        $terms = wp_get_post_terms($post->ID, ['category', 'post_tag']);
        if (!is_wp_error($terms)) {
            foreach ($terms as $term) {
                wp_cache_delete("archive_{$term->taxonomy}_{$term->slug}", 'custom_archives');
            }
        }
    }
}, 10, 3);

For term count recalculation with custom visible statuses:

add_action('transition_post_status', function($new, $old, $post) {
    if ($new === $old) return;

    $countable_statuses = ['publish', 'in-review'];
    $was_countable = in_array($old, $countable_statuses, true);
    $is_countable = in_array($new, $countable_statuses, true);

    if ($was_countable !== $is_countable) {
        $terms = wp_get_post_terms($post->ID, ['category', 'post_tag'], ['fields' => 'ids']);
        if (!is_wp_error($terms)) {
            foreach ($terms as $term_id) {
                wp_update_term_count($term_id, 'category');
            }
        }
    }
}, 10, 3);

For notifications, the key insight is that you must decide which transitions count as “publish events” for your workflow. If in-review is a visible status that editors consider “live enough to notify,” then the notification callback should trigger on any transition into publish regardless of the old status—not just draft_to_publish.

add_action('transition_post_status', function($new, $old, $post) {
    if ($new !== 'publish' || $old === 'publish') return;
    if (wp_is_post_revision($post->ID)) return;

    // This fires on draft_to_publish, in-review_to_publish, pending_to_publish, etc.
    wp_schedule_single_event(time() + 60, 'send_publication_notification', [$post->ID]);
}, 10, 3);

The 60-second delay via wp_schedule_single_event gives wp_after_insert_post time to fire and ensures terms and meta are saved before the notification reads them.

Documenting the State Machine

Once your transition pipeline handles custom statuses, the next failure mode is human: editors and developers who don’t share the same mental model of which transitions are valid. A post can go from draft to in-review to publish, but can it go from in-review back to draft? What about publish to in-review? Without a documented state machine, each editor guesses, and the audit table fills with transitions that break assumptions in downstream code.

The fix is to codify the state machine in code and enforce it. Register valid transitions as an array, then validate every transition before it happens:

function my_valid_transitions() {
    return [
        'draft' => ['in-review', 'publish', 'trash'],
        'in-review' => ['publish', 'draft', 'trash'],
        'publish' => ['draft', 'trash'],
        'pending' => ['in-review', 'publish', 'draft', 'trash'],
    ];
}

add_filter('wp_insert_post_data', function($data, $postarr) {
    if (empty($postarr['ID'])) return $data;

    $old_status = get_post_field('post_status', $postarr['ID']);
    $new_status = $data['post_status'];

    if ($old_status === $new_status) return $data;

    $valid = my_valid_transitions();
    $allowed = $valid[$old_status] ?? [];

    if (!in_array($new_status, $allowed, true)) {
        // Log the rejected transition for audit
        do_action('my_rejected_transition', $old_status, $new_status, $postarr['ID']);
        // Force the post back to its previous status
        $data['post_status'] = $old_status;
    }

    return $data;
}, 10, 2);

This filter runs before the post is saved, so rejected transitions never hit the database. The my_rejected_transition action lets you log the attempt for audit purposes—useful for identifying editors who are confused about the workflow or plugins that are trying to force invalid transitions.

The documentation that accompanies this state machine should be explicit enough that both human editors and tooling understand which transitions are valid and which are destructive. When editorial teams adopt AI-assisted drafting tools, the same state-machine documentation becomes the contract that defines how an AI writing app that fits the draft workflow participates in the editorial pipeline—what statuses it can write to, what transitions it can trigger, and where human review must intervene. Professional writing organizations are actively establishing guidelines for how AI tools participate in editorial workflows, reflecting the broader tension between AI-assisted drafting and maintaining professional writing standards (Authors Guild: AI Best Practices for Authors). The state machine is where that policy becomes enforceable code.

Reading the Audit Table as a Systems Map

Once the audit table has been running for a few weeks, it becomes a diagnostic tool for the entire editorial system. Here are the queries I run most often when diagnosing stuck workflows.

Find posts that bounce between statuses (a sign of editorial indecision or a broken auto-save that resets the status):

SELECT post_id, COUNT(*) as transition_count
FROM wp_post_status_audit
WHERE transitioned_at > DATE_SUB(NOW(), INTERVAL 30 DAY)
GROUP BY post_id
HAVING transition_count > 3
ORDER BY transition_count DESC;

Find transitions that bypassed the expected pipeline (e.g., draft straight to publish, skipping in-review):

SELECT a.*
FROM wp_post_status_audit a
WHERE a.old_status = 'draft'
  AND a.new_status = 'publish'
  AND a.transitioned_at > DATE_SUB(NOW(), INTERVAL 7 DAY)
ORDER BY a.transitioned_at DESC;

If your workflow requires in-review before publish, these transitions indicate either a plugin that’s forcing the status or an editor who found a way around the UI restriction.

Find the average time spent in each status to identify workflow bottlenecks:

SELECT
    a.post_id,
    a.old_status,
    a.new_status,
    TIMESTAMPDIFF(HOUR, a.transitioned_at, b.transitioned_at) as hours_in_status
FROM wp_post_status_audit a
LEFT JOIN wp_post_status_audit b ON a.post_id = b.post_id AND b.id > a.id
WHERE a.new_status != 'publish'
  AND b.id IS NOT NULL
ORDER BY hours_in_status DESC
LIMIT 20;

This query pairs each transition with the next one for the same post, giving you the time spent in each intermediate status. Posts that sit in in-review for 200 hours reveal an editorial bottleneck; posts that sit for 2 hours reveal a smooth pipeline.

Cleaning Up the Audit Table

The audit table grows by one row per transition. For a site with 50 posts per week and an average of 4 transitions per post, that’s 200 rows per week—roughly 10,000 rows per year. This is negligible. But if you have a bulk import or a plugin that fires transitions in a loop, the table can grow fast. Schedule a weekly cleanup via wp-cron that keeps only the last 90 days:

add_action('wp', function() {
    if (!wp_next_scheduled('prune_status_audit')) {
        wp_schedule_event(time(), 'weekly', 'prune_status_audit');
    }
});

add_action('prune_status_audit', function() {
    global $wpdb;
    $wpdb->query($wpdb->prepare(
        "DELETE FROM {$wpdb->prefix}post_status_audit WHERE transitioned_at < %s",
        gmdate('Y-m-d H:i:s', time() - 90 * DAY_IN_SECONDS)
    ));
});

For a more aggressive approach, keep only the most recent transition per post, plus any transitions involving publish:

DELETE a FROM wp_post_status_audit a
LEFT JOIN (
    SELECT post_id, MAX(id) as max_id
    FROM wp_post_status_audit
    GROUP BY post_id
) b ON a.post_id = b.post_id AND a.id = b.max_id
WHERE b.max_id IS NOT NULL
  AND a.new_status NOT IN ('publish', 'trash')
  AND a.transitioned_at < DATE_SUB(NOW(), INTERVAL 30 DAY);

Conclusion

The post status transition system is one of WordPress’s most critical and least-documented subsystems. It works silently when you use the five core statuses, and it breaks silently when you add custom ones. The failure isn’t in the code—it’s in the assumption that statuses form a known, finite set with predictable transition names.

The fix is systems engineering, not plugin selection. Instrument the transitions with an audit table. Map the hook firing order with WP-CLI. Build a transition pipeline that treats custom statuses as first-class citizens. Codify the valid state machine in code so that both editors and automated tooling share the same contract. When the next developer joins the team, the audit table is the documentation—the system’s behavior is recorded, not guessed at.

The posts that get stuck in in-review for three weeks aren’t an editorial problem. They’re a systems problem that you can now see, trace, and fix.

When WordPress Cron Goes Silent: Diagnosing and Fixing WP-Cron Failures on Managed Hosts

You schedule a post. The deadline passes. Nothing. You check the queue, and it’s just sitting there, stuck in “Scheduled” like a car with no engine. The problem isn’t your theme, a plugin conflict, or a missed click in the editorial calendar. The host killed your cron. Quietly. They flipped a switch that stops WordPress from running its own task scheduler, and they didn’t bother to tell you. For small-to-mid publishing teams, this is the kind of silent failure that turns a routine Tuesday into a frantic scramble.

WordPress cron isn’t a real cron daemon. It’s a virtual scheduler that wakes up only when someone visits your site. If traffic is low, cron sleeps. If the host blocks the site from calling itself, cron sleeps. If a server-level rule neuters wp-cron.php, cron sleeps. And when it sleeps, your scheduled posts, backup routines, and editorial notification plugins all sleep with it. The fix isn’t a plugin. It’s a hard cut over to the server’s actual cron system, and a clear understanding of why the virtual one failed in the first place.

Server rack with blinking lights, representing the hidden infrastructure where cron failures originate
Server-level cron failures often originate in configurations invisible to the WordPress dashboard.

The Architecture of WordPress Cron and Why It Fails

WordPress cron is not a background process. It’s a trigger embedded in the front-end request lifecycle. Every time a page loads, WordPress checks a queue of scheduled events stored in the wp_options table under the cron option. If an event’s scheduled time has passed, WordPress tries to execute it by sending a loopback HTTP request to /wp-cron.php. This request is non-blocking by default, using wp_remote_post() with a timeout of 0.01 seconds. The idea is to fire the event without slowing the page load. The reality is that this mechanism is fragile and breaks in predictable ways.

How Managed Hosts Disable WP-Cron Without Telling You

Many managed WordPress hosts disable the default cron behavior by adding a line to wp-config.php:

define('DISABLE_WP_CRON', true);

This constant stops WordPress from spawning the loopback request on page loads. The host’s intention is to replace it with a real server-side cron job that hits wp-cron.php directly. But if that server-side cron is misconfigured, missing, or silently removed during a platform update, your scheduled tasks stop. No error is logged in the WordPress dashboard. The only symptom is that future-dated posts stay in “Scheduled” status, and plugin tasks like backup rotations or editorial digest emails never fire.

Another common failure mode is loopback blocking. Some security configurations, such as ModSecurity rules or restrictive .htaccess files, block the server from making HTTP requests to itself. The result is identical: the cron request is never received, and the event queue stalls. You can test this directly from the command line with curl -I https://yoursite.com/wp-cron.php. If the response is anything other than HTTP 200, you have a loopback problem.

How to Detect a Silent Cron Failure

Don’t rely on the WordPress Site Health tool alone. It can report that “WP-Cron is working” even when it’s not. Instead, use a direct test:

  1. Create a post and schedule it for two minutes in the future.
  2. Open a new incognito browser window and visit the site’s homepage. Refresh several times over the next five minutes.
  3. Check the post status. If it remains “Scheduled,” cron is not executing.

For a more precise diagnosis, query the cron option directly. Run this SQL:

SELECT option_value FROM wp_options WHERE option_name = 'cron';

Unserialize the result. Look for timestamps older than the current server time. If you see events with past timestamps that never cleared, the queue is stalled. This is not a plugin conflict. This is a delivery failure.

Close-up of a server motherboard, emphasizing the hardware-level decisions that affect cron execution
Diagnosing cron failures requires looking past the application layer and into server-level configurations.

The Exact Fix: Replacing WP-Cron with a System Cron Job

The only reliable solution is to bypass WordPress’s virtual cron entirely and use the server’s real cron daemon. This eliminates dependency on site traffic and loopback requests. The steps are specific and must be followed in order.

Step 1: Disable WP-Cron in wp-config.php

Add this line to your wp-config.php file, above the “That’s all, stop editing” comment:

define('DISABLE_WP_CRON', true);

This stops WordPress from attempting to spawn cron on page loads. It does not delete the event queue. It simply prevents the broken delivery mechanism from firing.

Step 2: Create a System Cron Job That Calls wp-cron.php Directly

Access your server’s crontab. For most Linux-based hosts, use:

crontab -e

Add a line that executes wp-cron.php via the PHP command-line interface (CLI) or via wget. The CLI method is preferred because it avoids HTTP entirely and is not subject to loopback restrictions or execution time limits. The command is:

*/15 * * * * /usr/bin/php /path/to/your/site/wp-cron.php > /dev/null 2>&1

Replace /usr/bin/php with the correct path to your PHP binary. You can find it with which php. Replace /path/to/your/site with the absolute server path to your WordPress installation. The > /dev/null 2>&1 part discards output so you don’t get an email every 15 minutes.

If your host restricts CLI access, use wget as a fallback:

*/15 * * * * wget -q -O - https://yoursite.com/wp-cron.php > /dev/null 2>&1

This still relies on a loopback HTTP request, but it is initiated by the server’s cron daemon, not by a page load. It is more reliable than the default mechanism, but it can still fail if the host blocks outbound HTTP from cron or if DNS resolution is broken internally. Test it immediately after adding.

Step 3: Verify Execution and Clear the Stalled Queue

After setting the system cron, wait 15 minutes, then check the cron option again. Past-due events should now be cleared. If they are not, manually trigger cron from the command line to see errors:

/usr/bin/php /path/to/your/site/wp-cron.php

Watch for PHP fatal errors, memory exhaustion, or plugin-specific failures. A common issue is that a plugin registered a cron callback that relies on the HTTP context (e.g., it uses wp_remote_get() internally and the server blocks outbound requests). In that case, you must fix the plugin or replace it. The cron system itself is now working; the failure is in the callback.

If you see a “Nothing Found” error when trying to view scheduled posts after fixing cron, the issue may be related to permalink flushing or query alterations caused by the stalled queue. See What to Fix First When a New WordPress Site Says Nothing Found for a methodical approach to that specific symptom.

Why Plugins Like WP Crontrol Are Not the Answer

Plugins such as WP Crontrol let you view and manually run cron events. They are excellent debugging tools. They do not fix a broken delivery mechanism. If DISABLE_WP_CRON is set to true, or if loopback requests are blocked, clicking “Run Now” in WP Crontrol will do nothing. The plugin still relies on the same broken pathway. Use WP Crontrol to inspect the queue and identify stalled events, but do not mistake its interface for a solution.

When the Host Refuses to Give You Crontab Access

Some managed hosts lock down crontab and do not allow custom cron jobs. In this scenario, you have two options. First, contact support and demand they verify the server-side cron is correctly configured and actually running. Provide them with the exact test: schedule a post, wait, and show them the stalled cron option. Second, if they cannot or will not fix it, use an external cron monitoring service like EasyCron or Cron-job.org to ping wp-cron.php on a schedule. This is a last resort because it introduces an external dependency, but it is better than a silent failure.

Network cables connected to a server, illustrating the external dependencies that can be used as a cron fallback
External cron services can act as a fallback when the host refuses to provide direct crontab access.

Preventing Recurrence: Monitoring and Documentation for Teams

For a publishing team, a cron failure is a process failure. The fix is not just technical; it is operational. Implement a lightweight monitoring check that runs daily and confirms the cron queue is not stalled. A simple WP-CLI command can be scripted:

wp cron event list --fields=hook,next_run_relative --format=csv

Pipe this into a log file and alert if any event’s next run is more than one hour in the past. This can be integrated into existing server monitoring or run as a separate health-check script.

Document the cron configuration in your team’s runbook. Include the exact crontab entry, the PHP binary path, and the contact information for host support. When a new team member joins, or when the site is migrated, this documentation prevents the same failure from recurring. Assume the host will disable cron again during a platform update. It has happened before. It will happen again.

FAQ

Why does WordPress use a virtual cron instead of a real one?

WordPress uses a virtual cron to avoid requiring server-level access for basic scheduling. This design allows the software to run on cheap shared hosting where crontab is not available. The tradeoff is reliability: the virtual cron depends on site traffic and loopback requests, both of which can fail silently.

How can I tell if my host disabled WP-Cron without warning?

Check your wp-config.php file for the line define('DISABLE_WP_CRON', true);. If it exists and you did not add it, the host added it. Then verify whether a corresponding server-side cron job exists. If it does not, or if it is misconfigured, your scheduled tasks are not running. The definitive test is to schedule a post and observe whether it publishes without manual intervention.

Can I use a plugin to fix a broken cron system?

No. Plugins like WP Crontrol can help you view and debug the cron queue, but they cannot execute events if the underlying delivery mechanism is broken. If DISABLE_WP_CRON is set to true or loopback requests are blocked, no plugin can override that. The fix must happen at the server level with a real cron job or an external ping service.

What is the safest interval for a system cron job?

Fifteen minutes is the standard interval and works for most publishing workflows. Setting it lower (e.g., every 5 minutes) can increase server load unnecessarily, especially on sites with many cron events. Setting it higher (e.g., every 30 minutes) may delay time-sensitive tasks like scheduled posts. Test with 15 minutes and adjust only if you have a specific, measured need.

When WordPress Cron Dies Silently: Diagnosing and Fixing Scheduled Task Failures on Restricted Hosts

Your editorial calendar shows a post scheduled for 8:00 a.m. It’s now 8:45, and the post is still marked “Scheduled.” No error email. No dashboard warning. Just a missed deadline and a quiet failure. You log in, hit “Publish” manually, and the post goes live instantly. The problem isn’t the post. The problem is WordPress Cron—and your host has likely killed it without telling you.

This is a systems failure, not a content failure. For small-to-mid publishing teams running WordPress, the internal pseudo-cron system (WP-Cron) is a fragile dependency that breaks in specific, repeatable ways when a host disables loopback requests, restricts ALTERNATE_WP_CRON, or simply neuters the HTTP transport layer. The result: missed scheduled posts, stale cache purges, and plugin update checks that never fire. This article dissects the exact failure chain, shows you how to confirm the breakage, and gives you a durable fix that doesn’t rely on a hosting provider’s goodwill.

How WordPress Cron Actually Works (and Why It’s Not a Real Cron)

WordPress does not use a system-level cron daemon. Instead, it relies on a visitor-triggered HTTP request to /wp-cron.php. On every page load, WordPress checks a queue of scheduled events stored in the wp_options table under the cron option. If an event’s timestamp has passed, WordPress spawns a non-blocking HTTP request to itself to execute the hook. This is the spawn_cron() function in wp-includes/cron.php, which uses wp_remote_post() with a timeout of 0.01 seconds and blocking set to false.

The system is fragile by design. It depends on consistent site traffic to trigger the spawn. On a low-traffic editorial site—say, a niche publication with 500 daily visitors—cron may only fire when an editor happens to load a page. If the host disables loopback requests (a common security measure on shared or managed platforms), the wp_remote_post() call fails silently. The scheduled post sits in “missed schedule” purgatory. The editorial team blames WordPress. The real culprit is the hosting environment.

Confirming the Failure: Loopback Diagnostics and Cron Logging

Before you patch the system, you need proof. Start with a direct loopback test. Create a simple PHP file in your site root or use WP-CLI:

wp eval "
\$url = home_url('/wp-cron.php');
\$response = wp_remote_post( \$url, [ 'timeout' => 5, 'blocking' => true ] );
if ( is_wp_error( \$response ) ) {
    echo 'Loopback failed: ' . \$response->get_error_message();
} else {
    echo 'Loopback succeeded with status: ' . wp_remote_retrieve_response_code( \$response );
}
"

If you see a cURL error 7 (failed to connect) or a 403/404 status, your host is blocking the request. Many managed WordPress hosts disable loopbacks as a security measure, but they rarely document this. Next, check the cron queue directly:

wp cron event list

Look for events with a timestamp in the past. If you see a growing backlog of wp_scheduled_auto_draft_delete, wp_privacy_delete_old_export_files, or your own custom hooks, the internal cron system is not executing. The events are being queued but never spawned.

For a deeper trace, add a mu-plugin that logs cron spawn attempts:

add_action( 'init', function() {
    if ( isset(\$_GET['doing_wp_cron']) ) {
        error_log( 'WP-Cron triggered via HTTP at ' . current_time('mysql') );
    }
});

Check your error logs. If you see no entries after a scheduled post should have fired, the spawn request never reached your server. The failure is upstream.

The Real Fix: Bypassing WP-Cron Entirely with a System Cron Job

The only reliable solution for a production editorial site is to disable the internal pseudo-cron and invoke wp-cron.php via a genuine system cron job. This removes the dependency on site traffic and loopback HTTP requests. The trade-off is that you need access to the server’s crontab—something many managed hosts provide, but some restrict. If you’re on a host that locks down crontab, you’ll need to escalate or migrate. There is no reliable plugin-only workaround.

Step 1: Disable WP-Cron in wp-config.php

Add this line above the “That’s all, stop editing!” comment:

define('DISABLE_WP_CRON', true);

This prevents WordPress from attempting to spawn cron on every page load. It stops the failed loopback attempts and the associated performance penalty (each failed attempt can add 1–3 seconds to a page load, depending on timeout settings).

Step 2: Set Up a System Cron Job

Access your server’s crontab (via cPanel, Plesk, or SSH). Add an entry that directly executes wp-cron.php at your desired interval. For a news site publishing 5–10 articles daily, every 5 minutes is sufficient. For a high-frequency site, consider every 1–2 minutes. The command must use the server’s PHP binary, not a web request:

*/5 * * * * /usr/bin/php /path/to/your/site/wp-cron.php > /dev/null 2>&1

Critical details: Use the full path to the PHP binary (find it with which php). Use the full server path to wp-cron.php, not a URL. The > /dev/null 2>&1 suppresses output so cron doesn’t email you on every execution. If your host uses a custom PHP version (e.g., PHP 8.1 via cPanel), the path might be /opt/cpanel/ea-php81/root/usr/bin/php. Verify with your host’s documentation or support.

Step 3: Verify Execution and Timing

After setting the cron job, schedule a test post for 2 minutes in the future. Wait 5 minutes, then check if it published. If not, manually run the command via SSH to see errors:

/usr/bin/php /path/to/your/site/wp-cron.php

Common failures: PHP Fatal error: require_once(): Failed opening required 'wp-load.php'—this means the path to wp-cron.php is wrong or the working directory is incorrect. Fix by setting the cron job to run from the WordPress root:

*/5 * * * * cd /path/to/your/site && /usr/bin/php wp-cron.php > /dev/null 2>&1

Another failure mode: ALTERNATE_WP_CRON redirects. Some guides suggest defining ALTERNATE_WP_CRON as a workaround for loopback failures. This forces WordPress to use a redirect-based approach instead of a direct POST. It’s a bandage, not a fix. It still depends on HTTP transport and can fail under the same host restrictions. If you’re setting a system cron job, ensure ALTERNATE_WP_CRON is not defined—it’s unnecessary and can cause double-execution.

When Your Host Blocks All HTTP Requests from the Server

Some hosts (particularly those using containerized environments or aggressive mod_security rules) block outbound HTTP requests from the server entirely. In this case, even a system cron job that calls wp-cron.php via PHP will fail because wp-cron.php internally uses wp_remote_post() to spawn individual cron events. The spawn call is designed to be non-blocking, but if the HTTP transport is dead, the events never execute.

You can test this by running a manual HTTP request from the server:

curl -I https://your-site.com/wp-cron.php

If this returns a connection error or a 403, your host is blocking outbound HTTP. The workaround is to bypass the HTTP layer entirely and execute cron events directly via WP-CLI:

*/5 * * * * cd /path/to/your/site && wp cron event run --due-now > /dev/null 2>&1

This command uses WP-CLI to process all due cron events in a single, server-side execution. It’s more efficient than hitting wp-cron.php because it doesn’t spawn separate HTTP requests for each event. However, it requires WP-CLI to be installed and functional on the server—something not all managed hosts support. If WP-CLI is unavailable, you’re left with the direct PHP call to wp-cron.php as the next-best option.

Why This Matters for Editorial Workflows

When cron fails, the editorial team loses trust in the CMS. Writers schedule posts and they don’t go live. Editors set revision reminders and they never arrive. The site’s internal consistency decays: stale transients pile up, backup plugins skip cycles, and cache purges tied to cron hooks leave outdated content visible. For a small-to-mid publishing team, this isn’t just a technical annoyance—it’s a direct hit to credibility. Readers see a post dated yesterday that just appeared in their feed. The team starts manually publishing everything, which defeats the purpose of a scheduled editorial calendar.

This is also a governance issue. If your team relies on WordPress’s built-in scheduling, you’re implicitly trusting your host to support loopback requests. Most shared and managed WordPress hosts do not guarantee this. They disable it for security, then fail to document the impact. The editorial team doesn’t know why posts miss schedule; the technical team may not even be aware of the dependency. A single define('DISABLE_WP_CRON', true); and a crontab entry removes that hidden dependency and makes the system’s behavior explicit and auditable.

Monitoring Cron Health Over Time

After migrating to a system cron, you need visibility. Install a cron management plugin like WP Crontrol to view all registered cron events and their schedules. Check the “Next Run” column regularly. If you see events piling up with past-due timestamps, your system cron job has failed or been removed. This can happen silently during server migrations, PHP version changes, or control panel updates.

Set up a secondary monitor: a simple script that checks if a known cron event (like wp_scheduled_delete) has run within the last 24 hours. If not, it sends an alert. This can be a standalone PHP file invoked by the same system cron, or a health-check endpoint monitored by an external service like UptimeRobot. The key is to not rely on WordPress’s internal Site Health tool—it only reports if WP-Cron is disabled, not if the system cron job is actually executing events.

Handling Long-Running Cron Tasks

Some editorial workflows involve heavy cron tasks: generating PDF editions, syncing with third-party distribution APIs, or processing large XML sitemaps. When you switch to a system cron, these tasks run synchronously within the cron execution window. If a task takes 4 minutes and your cron interval is 5 minutes, you’re fine. If it takes 12 minutes, you risk overlapping executions and resource exhaustion.

Mitigate this by locking. WordPress core uses a locking mechanism for some tasks, but custom plugins often don’t. You can implement a simple file-based lock in your system cron command:

*/5 * * * * cd /path/to/your/site && flock -n /tmp/wp-cron.lock /usr/bin/php wp-cron.php > /dev/null 2>&1

The flock command ensures only one instance of wp-cron.php runs at a time. If a previous execution is still running, the new one exits immediately. This prevents the “thundering herd” problem where multiple cron executions pile up and consume all available PHP workers, taking the site offline.

FAQ: WordPress Cron Failures on Restricted Hosts

Why do scheduled posts miss their publish time even though the site has traffic?

WordPress’s internal cron system requires an HTTP request to /wp-cron.php to trigger scheduled events. If your host blocks loopback requests—HTTP calls from the server to itself—the trigger never fires, regardless of traffic. The events sit in the queue with past-due timestamps until someone visits the admin dashboard and manually triggers them, or until a plugin forces a cron spawn. This is a host-level restriction, not a WordPress bug.

Can I fix this without touching server configuration?

Not reliably. Some plugins attempt to replace WP-Cron with a third-party ping service, but this introduces an external dependency and potential security risk. The only durable fix is to disable WP-Cron and set up a system cron job. If your host doesn’t provide crontab access, you’ll need to escalate to their support or consider a host that does. This is a non-negotiable requirement for any production editorial site.

What’s the difference between wp cron event run and hitting wp-cron.php?

wp cron event run --due-now executes all due cron events directly in the current PHP process, without spawning separate HTTP requests. Hitting wp-cron.php via a web request spawns each event as a separate non-blocking HTTP call. The WP-CLI method is more efficient and avoids loopback issues entirely, but it requires WP-CLI to be installed. The wp-cron.php method is more portable but still vulnerable to HTTP transport failures if the host blocks outbound connections.

How do I know if my host blocks loopback requests?

Run the loopback test described earlier. If you get a connection error or a 403/404, loopbacks are blocked. You can also check your host’s documentation or ask their support directly: “Do you allow WordPress loopback requests from the server to itself?” Many support teams won’t understand the question, so be prepared to explain that it’s an HTTP request from the server to its own domain. If they confirm it’s blocked, ask if they provide crontab access as an alternative.

Next Steps for Your Editorial Infrastructure

Once you’ve stabilized cron, audit the rest of your site’s silent failure points. A common companion issue is permalink structure corruption after a migration or plugin conflict, which can cause “Nothing Found” errors on published content. If you’ve seen that, the diagnostic approach is similar: isolate the rewrite rules, test with a default theme, and rebuild the .htaccess structure. Read What to Fix First When a New WordPress Site Says Nothing Found for the exact sequence.

For teams managing multiple sites, consider standardizing your cron configuration as part of your site provisioning checklist. A single mu-plugin that logs cron execution, combined with a monitoring endpoint, can prevent the “silent failure” scenario across your entire portfolio. The goal is to make scheduled tasks as reliable as your editorial calendar demands—no surprises, no missed deadlines, no trust erosion.

Server rack with blinking lights, representing hosting infrastructure where cron jobs execute

Close-up of a laptop screen showing code and terminal commands for debugging WordPress

Person working at a desk with multiple monitors, managing editorial workflows and server tasks

How to Trace Which Hook Actually Fires Last When Multiple Callbacks Compete

WordPress hooks aren’t a queue. They’re a priority-ordered stack of callbacks, and when two or more functions fight for the same hook, the last one to fire wins—but only for the output it controls. The real problem is that “last” is a slippery concept. It depends on priority integers, registration order, and whether the hook is an action or a filter. For small-to-mid publishing teams running custom editorial workflows, a misordered hook can silently overwrite a byline, swap a template part, or kill a schema property right before the page renders. This article dissects the exact mechanism that determines final execution, shows you how to trace it without guesswork, and gives you the fix when your metadata keeps vanishing.

Close-up of tangled wires representing competing WordPress hook callbacks

Why “Last” Is a Lie Until You Read the Priority Queue

WordPress hooks—actions and filters—are stored in the $wp_filter global, an associative array of WP_Hook objects. Each WP_Hook object holds a callbacks property: an array of priority-indexed arrays. When a hook fires, WordPress iterates through priorities in ascending order. Within a single priority, callbacks execute in the order they were added. The “last” callback is simply the one at the highest priority that actually runs, or the last one added at that priority if no higher priority exists. But here’s the failure mode: if two callbacks both modify the same global variable, post object property, or output buffer, the later one silently clobbers the earlier one. No error, no warning. Just missing data.

This matters acutely for editorial teams using hooks to inject custom bylines, modify the_content for paywalls, or append disclosure text. A plugin registered at priority 10 can overwrite a theme function at priority 10 if the plugin loaded later. The fix is not to guess; it’s to dump the hook’s callback stack and read the order.

How WordPress Builds the Hook Execution Order

When you call add_action() or add_filter(), you’re pushing a callback onto the WP_Hook object’s internal array. The default priority is 10. If two callbacks share the same priority, the one added first fires first. This is critical: registration order within a priority is preserved. The WP_Hook::add_filter() method appends the callback to the priority’s array using $this->callbacks[$priority][] = $callback;. No sorting, no reordering. So if Plugin A hooks into the_content at priority 10, and Plugin B hooks into the_content at priority 10 later, Plugin B’s callback runs second—and if both return modified content, Plugin B’s version is what the visitor sees.

But priority numbers override registration order. A callback at priority 11 always fires after all priority 10 callbacks, even if it was registered first. This is the most common source of confusion: developers assume “last added” means “last fired,” but WordPress sorts by priority first, then by registration order within that priority.

The WP_Hook Internals That Matter

The WP_Hook class (in wp-includes/class-wp-hook.php) stores callbacks in the $callbacks property, which is an array of arrays. The outer keys are integer priorities. The inner arrays are numerically indexed in the order callbacks were added. When apply_filters() or do_action() runs, WordPress calls WP_Hook::apply_filters() or WP_Hook::do_action(). Both methods call ksort() on the priorities, then iterate. Within each priority, they walk the inner array sequentially. If a callback returns a value (for filters), that value becomes the new $value passed to the next callback. For actions, there is no return value chaining—each callback simply runs.

The exact point of failure for editorial teams is often a filter like the_content or wp_head. A plugin adds a schema markup filter at priority 10. The theme adds a conflicting filter at priority 10, but the theme’s functions.php loads after plugins. The theme’s filter runs second and overwrites the plugin’s output. The editorial team sees incomplete structured data in Google Search Console and has no idea why.

Server rack with tangled cables symbolizing conflicting WordPress hook priorities

Tracing the Actual Execution Order: A Debugging Protocol

Stop adding var_dump() calls to your theme’s functions.php and hoping to catch the right moment. The hook system is introspectable. Use this three-step protocol to get the ground truth.

Step 1: Dump the Hook’s Callback Registry

Access the global $wp_filter array directly. For a hook named 'the_content', the callbacks live in $wp_filter['the_content']->callbacks. Print it with a function hooked at an absurdly high priority—9999—so it runs after everything else. This gives you a snapshot of what was registered, but not what actually ran, because callbacks can remove themselves or others mid-execution.

add_action( 'wp_head', function() {
    global $wp_filter;
    if ( isset( $wp_filter['the_content'] ) ) {
        echo '<!--' . "\n";
        print_r( $wp_filter['the_content']->callbacks );
        echo '-->' . "\n";
    }
}, 9999 );

This dumps the entire priority stack into an HTML comment. Look for your hook’s priority and count the callbacks. If you see two at priority 10, the one listed second fires last. But this is a static view. It doesn’t account for callbacks that conditionally return early, or for filters that short-circuit by returning null before later callbacks run.

Step 2: Inject Trace Markers at Each Priority Level

To see what actually executes, insert non-destructive markers. For filters, wrap the existing callbacks with a logging function that records the value before and after. This is invasive, so do it in a staging environment that mirrors production. Use the all hook—a special hook that fires for every hook—to log the sequence without modifying individual callbacks.

add_action( 'all', function ( $tag ) {
    static $logged = array();
    if ( 'the_content' !== $tag ) {
        return;
    }
    global $wp_filter;
    if ( isset( $wp_filter[ $tag ] ) ) {
        $priorities = array_keys( $wp_filter[ $tag ]->callbacks );
        sort( $priorities );
        foreach ( $priorities as $priority ) {
            foreach ( $wp_filter[ $tag ]->callbacks[ $priority ] as $idx => $callback ) {
                $key = $priority . ':' . $idx;
                if ( ! isset( $logged[ $key ] ) ) {
                    $logged[ $key ] = true;
                    error_log( sprintf( 'Hook %s priority %d index %d fires', $tag, $priority, $idx ) );
                }
            }
        }
    }
}, 0 );

This logs every callback that is registered at the moment the hook fires, in execution order. Check your debug log. The last entry for a given priority is the callback that had the final say—unless a higher priority callback also ran. The all hook fires before the specific hook’s callbacks, so the log reflects the state at the start of execution. For a true trace of what actually ran and returned, you need to hook into the specific filter at each priority and log the return value.

Step 3: The “Shadow Filter” Method for Final Output

Create a filter on the same hook at priority PHP_INT_MAX. This callback receives the final value after all other filters have run. Compare it to the value at priority 0 (or the default). The difference tells you which callback’s modification stuck. If the final value matches what your callback produced, your callback is the last writer. If it doesn’t, something ran after you.

add_filter( 'the_content', function( $content ) {
    // Snapshot before any modifications.
    update_option( 'debug_content_before', md5( $content ) );
    return $content;
}, 0 );

add_filter( 'the_content', function( $content ) {
    // Snapshot after all modifications.
    $before = get_option( 'debug_content_before' );
    if ( md5( $content ) !== $before ) {
        error_log( 'the_content was modified by a filter.' );
    }
    return $content;
}, PHP_INT_MAX );

This method doesn’t identify the culprit, but it confirms that a conflict exists. Combine it with the priority dump to narrow the suspects. Then remove callbacks one by one using remove_filter() with the exact priority and callback signature until the conflict disappears.

Developer debugging code on multiple monitors with WordPress hook trace output

Common Failure Modes in Editorial Workflows

Publishing teams encounter hook conflicts in predictable places. Here are the three I see repeatedly when auditing sites that lose metadata or break their content pipeline.

1. Schema Markup Overwrite on wp_head

Multiple plugins and themes inject JSON-LD into wp_head using add_action() with priority 10. Because wp_head is an action, there is no return value to chain—each callback echoes its output directly. The last callback to echo wins the visible slot, but earlier echoes still appear in the HTML source, creating duplicate or conflicting schema. Google may ignore all of it. The fix: consolidate all schema output into a single filter on wp_head that builds one JSON-LD array, or use a plugin like Schema Pro that takes ownership of the hook and removes others.

2. Byline Injection on the_content

A theme adds a byline via add_filter( 'the_content', 'theme_byline', 10 ). A guest-author plugin adds its own byline at priority 10. The plugin loads after the theme, so its byline appears, and the theme’s byline is overwritten. The editorial team wanted both. The fix: change the theme’s filter to priority 9, or use a single filter that concatenates both bylines. If you can’t edit the plugin, hook into the_content at priority 11 and prepend the theme’s byline to the already-filtered content.

3. Template Part Hijacking via template_include

The template_include filter determines which PHP file loads for a given request. It’s a single-value filter: the last callback to return a non-empty string wins. A plugin that returns a custom template path at priority 10 will override the theme’s template_include filter at the same priority if the plugin runs later. This can silently replace a custom article template with a generic one, breaking the layout for specific post types. The diagnostic: hook into template_include at priority PHP_INT_MAX and log the final path. Then work backward through the priority stack to find the override.

When remove_action() Fails: Signature Mismatches

You’ve identified the rogue callback. You call remove_filter( 'the_content', 'rogue_function', 10 ). Nothing happens. The callback still fires. This is because remove_filter() requires the exact same arguments as the original add_filter() call, including the $accepted_args parameter. If the original was added with add_filter( 'the_content', 'rogue_function', 10, 2 ), your removal must also specify 10, 2. The WP_Hook::remove_filter() method uses spl_object_hash() for closures and strict string matching for function names, but the priority and accepted_args must align.

For closures, you’re out of luck unless you have a reference to the original closure object. For static methods, use array( 'ClassName', 'method' ). For object methods, you need the exact object instance. If the plugin stores the instance in a private property, you can’t remove it without reflection or a shim. In that case, override the output by hooking at a higher priority and returning your desired value, or use the all hook to conditionally remove the callback during execution.

Building a Hook Audit Into Your Deployment Pipeline

For teams managing multiple sites or frequent plugin updates, manual tracing doesn’t scale. Add a hook audit script to your staging environment that runs after each deployment. The script should:

  • Dump all registered hooks and their callbacks into a JSON file using $wp_filter.
  • Compare the dump to a known-good baseline using diff.
  • Flag any new callbacks on critical hooks: the_content, wp_head, template_include, save_post, wp_insert_post_data.
  • Alert if two callbacks on the same hook share a priority and both modify the same data type.

This catches conflicts before they reach production. A simple WP-CLI command can generate the dump: wp eval 'print_r( json_encode( $GLOBALS["wp_filter"] ) );'. Parse it with a script that checks for priority collisions on your editorial hooks.

FAQ

How do I know which hook is causing my custom field to disappear after saving a post?

Hook into save_post at priority 0 and log the $_POST data and the post meta. Then hook into save_post at priority PHP_INT_MAX and log the post meta again. The difference tells you which callback modified or deleted your field. Check the $wp_filter['save_post']->callbacks array for callbacks registered at priorities between your two log points. The wp_insert_post_data filter can also alter data before it hits the database; trace it the same way.

Can I force my callback to always run last without using a high priority number?

No. Priority is the only mechanism. Use PHP_INT_MAX as your priority to guarantee your callback runs after all others, unless another callback also uses PHP_INT_MAX and was registered after yours. In that edge case, the later-registered callback wins. To be absolutely last, hook into shutdown at priority PHP_INT_MAX and manipulate output there, but that’s a blunt instrument and can break caching.

Why does my the_content filter work on single posts but not on archive pages?

Archive pages often use the_excerpt or a custom template function that doesn’t apply the_content filters. Check if your theme calls the_excerpt() instead of the_content() in archive templates. The the_excerpt filter has its own hook stack. If you need to modify both, hook into get_the_excerpt as well, or use a lower-level filter like the_post to modify the post object before either function runs. Also verify that your archive template isn’t using get_the_content() without applying filters—that function returns raw content.

What’s the difference between do_action_ref_array() and do_action() for hook execution order?

None for execution order. Both methods call the same WP_Hook::do_action() internally. The only difference is how arguments are passed: do_action_ref_array() accepts an array of arguments, which can be more memory-efficient for large argument sets. The priority and registration order logic is identical. Use whichever fits your data structure; it won’t change which callback fires last.

For more on diagnosing WordPress configuration issues that can compound hook problems, read What to Fix First When a New WordPress Site Says Nothing Found. Hook conflicts often surface as missing content, and that article covers the foundational checks that rule out permalink and query problems before you dive into callback tracing.

The Difference Between wp_enqueue_script() in header.php and the Proper Hook (And When It Matters)

You’re staring at a half-broken WordPress admin screen. The media library won’t load. A plugin’s modal window throws a jQuery error. You trace the problem back to a single line you added to header.php six months ago: wp_enqueue_script('my-custom-js', get_template_directory_uri() . '/js/custom.js', array('jquery'), null, true);. It worked on the front end, so you never questioned it. But now, in the admin, or on a page where a plugin expects its own scripts to be registered in a specific order, the whole thing collapses. This is the quiet cost of calling wp_enqueue_script() directly in a template file instead of using the proper WordPress hook system. It’s not a syntax error. It’s a timing error, and it breaks the dependency resolver, the script loader, and the entire enqueue pipeline that WordPress relies on to keep its JavaScript ecosystem from imploding.

This article dissects exactly what happens inside WordPress when you enqueue a script in header.php versus when you use the wp_enqueue_scripts action hook. We’ll walk through the internal execution order, the WP_Scripts class, the dependency chain, and the real-world failures that arise from getting the timing wrong. No fluff, no hand-holding—just the specific internals and the exact fix.

Lines of code on a screen, representing WordPress script debugging

What Actually Happens When You Call wp_enqueue_script() in header.php

To understand the failure, you need to understand the WordPress load sequence. When a request hits your site, WordPress boots in a strict order: wp-config.php, then wp-settings.php, which loads active plugins and the theme’s functions.php. After that, the template file is loaded—header.php, then the content template, then footer.php. The wp_enqueue_script() function is available as soon as WordPress core is loaded, so calling it in header.php doesn’t throw a fatal error. The function runs. It registers the script in the global $wp_scripts object. But here’s the problem: by the time header.php executes, the wp_head action has already fired. That action is where WP_Scripts::do_head_items() runs, outputting the actual <script> tags for all enqueued scripts. If you enqueue a script after wp_head has fired, the script is registered but never printed. The browser never sees it.

This is the core mechanical failure. The wp_head() function, called in header.php, triggers the wp_head action. If you place your wp_enqueue_script() call after wp_head() in the same file, the script is added to the queue too late. The output buffer for the head section has already been flushed. The script simply vanishes from the front-end source code. You’ll see no error in the browser console because the script tag was never generated. You’ll only notice the missing functionality—a broken slider, a non-functional form, a jQuery-dependent component that silently fails.

Even if you place the call before wp_head() in header.php, you’re still operating outside the intended architecture. WordPress’s script dependency system relies on hooks to resolve the correct order of scripts. When you enqueue directly in a template, you bypass the priority system of add_action(). Plugins and themes that enqueue scripts on the wp_enqueue_scripts hook with specific priorities (e.g., to ensure jQuery loads before their custom script) can’t account for your rogue enqueue. The result is a race condition: sometimes your script loads in the right order, sometimes it doesn’t, depending on the exact millisecond of execution and the order of template inclusion. This is the kind of bug that survives QA because it only appears under specific plugin combinations or server loads.

The Proper Hook: wp_enqueue_scripts and Its Internal Mechanics

The correct place to enqueue scripts on the front end is the wp_enqueue_scripts action hook. This hook fires inside wp_head(), before the script tags are printed. Here’s the exact sequence: wp_head() calls do_action('wp_head'). One of the default callbacks attached to wp_head is wp_enqueue_scripts() (the function, not the hook). That function calls do_action('wp_enqueue_scripts'). This is the hook you attach your callback to. After your callback runs and adds scripts to the queue, wp_head() continues, eventually calling WP_Scripts::do_head_items(), which iterates through the registered and enqueued scripts, resolves dependencies, and prints the <script> tags in the correct order.

This isn’t just a convention. It’s a contract. By using the wp_enqueue_scripts hook, you guarantee that your script registration happens before the output phase. You also gain access to the full dependency resolution system. The WP_Scripts class (an instance of WP_Dependencies) maintains a queue of enqueued scripts, a list of registered scripts, and a directed acyclic graph of dependencies. When you call wp_enqueue_script('my-script', ...) inside the hook, the class checks if ‘my-script’ is already registered. If not, it registers it. Then it marks it for output. If ‘my-script’ depends on ‘jquery’, the class ensures ‘jquery’ is also enqueued and that its <script> tag appears first. This all happens in memory before any HTML is sent to the browser. The timing is deterministic.

What About Admin Scripts? The admin_enqueue_scripts Hook

The same principle applies to the WordPress admin area, but the hook is different. For admin pages, use admin_enqueue_scripts. This hook passes the current admin page slug as a parameter, allowing you to conditionally load scripts only on specific screens. Loading a heavy JavaScript file on every admin page because you enqueued it in your theme’s header.php is a common performance drain. It slows down the post editor, the dashboard, and every plugin’s settings page. The proper pattern:

add_action('admin_enqueue_scripts', function($hook_suffix) {
    if ('post.php' !== $hook_suffix && 'post-new.php' !== $hook_suffix) {
        return;
    }
    wp_enqueue_script('my-admin-script', get_template_directory_uri() . '/js/admin.js', array('jquery'), '1.0.0', true);
});

This loads the script only on the post editing screens. Compare that to dumping it in header.php, where it would load on every admin page, potentially conflicting with other scripts that expect a clean environment.

WordPress admin dashboard with code editor, illustrating script management

When the Wrong Approach Actually Works (And Why You Shouldn’t Trust It)

There are edge cases where enqueuing in header.php appears to work. If you call wp_enqueue_script() before wp_head() in the same file, and if no other scripts depend on yours, and if no plugins are using the script_loader_tag filter to modify your script’s attributes, the script tag will likely appear in the output. This is because wp_head() hasn’t yet called do_head_items(), so your script is added to the queue just in time. But this is fragile. A future plugin update might add a dependency on your script, or a new theme might change the order of template parts. The moment something shifts, your script breaks silently.

Another apparent success case: enqueuing in footer.php before wp_footer(). The wp_footer() function triggers the wp_footer action, which calls WP_Scripts::do_footer_items(). If you enqueue a script with the $in_footer parameter set to true right before wp_footer(), it might get printed. But again, you’re bypassing the dependency resolver’s intended execution context. Scripts enqueued in the footer that depend on scripts enqueued in the header (via the proper hook) may not resolve correctly because the header items have already been processed. The WP_Scripts class is not designed to handle late additions to the queue after do_head_items() has run.

Real Failure Modes: Dependency Hell and the jQuery Migrate Problem

Let’s get specific. A publishing team runs a custom theme with a handful of editorial plugins: Advanced Custom Fields, Yoast SEO, and a custom plugin that adds a review panel to the post editor. The theme’s header.php includes a direct call to wp_enqueue_script('theme-review', ...) with a dependency on ‘jquery’. On the front end, everything works. In the admin, the review panel’s JavaScript throws Uncaught TypeError: $ is not a function. Why? Because in the admin, WordPress loads jQuery in noConflict mode, and many plugins use the jquery handle but expect a specific version or a specific load order. The theme’s script, enqueued in header.php, runs before the admin’s admin_enqueue_scripts hook has a chance to register the correct jQuery version or the jQuery Migrate script. The dependency is technically met—‘jquery’ is registered—but the execution context is wrong. The script executes before Migrate has patched any deprecated functions, or before another plugin has deregistered the default jQuery and registered a newer version. The result is a broken admin interface that prevents editors from saving reviews.

Another common failure: a plugin uses the script_loader_tag filter to add async or defer attributes to all enqueued scripts. This filter runs during WP_Scripts::do_item(), which is called from do_head_items() or do_footer_items(). If you enqueue a script directly in header.php after wp_head(), the filter never sees it. The script tag is never generated, so the filter has nothing to modify. If you enqueue before wp_head(), the filter might catch it, but only if the filter is attached with a priority that runs after your enqueue. This is a lottery.

The Correct Implementation Pattern

The fix is simple and absolute: never call wp_enqueue_script() in a template file. Always use the appropriate action hook in your theme’s functions.php or a custom plugin. Here’s the canonical pattern for a theme:

// In functions.php
add_action('wp_enqueue_scripts', 'jooomshaper_enqueue_theme_scripts');
function jooomshaper_enqueue_theme_scripts() {
    wp_enqueue_script(
        'jooomshaper-main',
        get_template_directory_uri() . '/js/main.js',
        array('jquery'),
        filemtime(get_template_directory() . '/js/main.js'),
        true
    );
}

Using filemtime() as the version parameter is a practical cache-busting technique. It ensures that when you update the script file, the version query string changes, forcing browsers to download the new file. This avoids the stale-cache problem that plagues publishing teams when they push a JavaScript hotfix and nobody sees it because the old file is cached with a static version number like ‘1.0.0’.

For admin scripts, use the same pattern but hook into admin_enqueue_scripts. For login page scripts, use login_enqueue_scripts. For the block editor, use enqueue_block_editor_assets. Each context has its own hook, and using the correct one ensures your scripts load only where needed and in the proper order relative to core and plugin scripts.

When wp_enqueue_script() in a Template Is a Symptom of a Deeper Problem

Sometimes, finding wp_enqueue_script() in a template file isn’t the root cause—it’s a symptom of a broken development workflow. I’ve seen this in teams where the “developer” doesn’t have access to the theme’s functions.php or is afraid to touch it, so they inject scripts into template files via a page builder or a custom field. This is a governance failure, not a technical one. The fix is to establish a clear process for script management: all scripts are registered and enqueued in a central location, version-controlled, and subject to code review. For small-to-mid publishing teams, this often means creating a site-specific plugin that houses all custom functionality, including script enqueues, so that theme updates don’t wipe out critical business logic.

Another symptom: a team is using a child theme but overriding entire template files just to add a script tag. This defeats the purpose of a child theme, which is to inherit parent functionality while making minimal, surgical changes. The correct approach is to enqueue the script in the child theme’s functions.php using the proper hook. If the script needs to be added in a specific location in the DOM, use wp_add_inline_script() or a custom action hook in the parent theme’s template, not a direct enqueue in the overridden template.

Close-up of debugging code on a monitor, representing script dependency resolution

Debugging a Missing Script: The Step-by-Step Triage

When a script isn’t loading, don’t guess. Use a systematic approach:

  1. Check the page source. Is the <script> tag present? If not, the script was never enqueued or was enqueued too late.
  2. Check the browser console. Are there 404 errors for the script file? If so, the URL is wrong. Are there dependency errors? If so, the script is loading but its dependencies aren’t met.
  3. Use the Query Monitor plugin. This tool shows you every enqueued script and style, their dependencies, and their load order. It also flags scripts that are enqueued but have missing dependencies. This is the fastest way to spot a script that was registered but never printed because of a timing issue.
  4. Trace the hook execution. Add a temporary error_log() call inside your wp_enqueue_scripts callback to confirm it’s firing. Then add one inside the template file where you suspect a rogue enqueue. Compare the timestamps. If the template enqueue happens after the hook, you’ve found the problem.

If you’re dealing with a site that has scripts enqueued in multiple places—some in functions.php, some in template files, some via plugins—the first step is to consolidate. Move all enqueues to the proper hooks. This alone often resolves mysterious JavaScript errors because it restores the deterministic load order that WordPress expects.

The Impact on Editorial Workflow Automation

For publishing teams, broken JavaScript isn’t just a technical annoyance. It directly blocks editorial work. If the post editor’s JavaScript fails, editors can’t save drafts, can’t use custom fields, can’t access the media library. If the front-end JavaScript fails, readers see a broken site, and the analytics tracking code might not fire, leading to data gaps. These failures are often intermittent, appearing only for certain users or certain posts, because they depend on the specific combination of scripts loaded on that page. A script enqueued in header.php might work on the homepage but fail on a single post because a plugin conditionally loads an additional script that creates a dependency conflict. This is the kind of bug that generates support tickets with vague descriptions like “the save button doesn’t work sometimes,” and it erodes trust in the publishing platform.

The fix is not just technical; it’s procedural. Every script on the site should have a known owner, a known purpose, and a known load context. This is especially important when multiple plugins are involved, as is common in publishing stacks. A plugin that adds a review box, a plugin that adds social sharing buttons, and a theme that adds a custom navigation script all need to coexist. The only way to guarantee that coexistence is to use the hook system as designed, so that WordPress can resolve the dependency graph correctly.

FAQ

Why does my script work when I put it in header.php but not when I use the wp_enqueue_scripts hook?

If your script works in header.php but not when properly hooked, the most likely cause is a dependency declaration mismatch. In header.php, you might be loading jQuery via a hardcoded <script> tag before your custom script, which bypasses WordPress’s dependency system entirely. When you switch to wp_enqueue_scripts, you must declare ‘jquery’ as a dependency in the $deps array. If you omit that, your script loads before jQuery, and you get a $ is not defined error. The fix is to ensure your wp_enqueue_script() call includes array('jquery') as the third parameter.

Can I enqueue scripts conditionally based on the page template?

Yes, and you should. Use the is_page_template() function inside your wp_enqueue_scripts callback to conditionally load scripts only on specific page templates. This reduces the overall script payload and avoids loading unnecessary JavaScript on pages that don’t need it. For example: if (is_page_template('template-review.php')) { wp_enqueue_script(...); }. This is far cleaner than adding the enqueue directly in the template file, because it keeps all script logic in one place and still respects the proper hook timing.

What’s the difference between wp_enqueue_script() and wp_register_script()?

wp_register_script() tells WordPress about a script—its URL, dependencies, and version—but does not mark it for output. wp_enqueue_script() both registers the script (if not already registered) and marks it for output. You can register a script early (e.g., on init) and enqueue it later only when needed. This is useful for scripts that are used in multiple contexts. If you call wp_enqueue_script() in header.php, you’re both registering and enqueuing at the wrong time, which compounds the problem.

How do I fix a site that already has scripts enqueued in template files?

Audit every template file in your theme and child theme. Search for wp_enqueue_script, wp_enqueue_style, <script, and <link. Move each one to the appropriate hook in functions.php. If a script is hardcoded with a <script> tag, replace it with a proper wp_enqueue_script() call. After moving everything, test the site thoroughly, paying special attention to pages that combine multiple plugins. Use Query Monitor to verify that all scripts are loading in the correct order and that no dependencies are missing. This is tedious but necessary. A single misplaced enqueue can cause cascading failures that are hard to diagnose later.

Why Your Child Theme Functions.php Load Order Breaks Plugin Expectations

Your child theme’s functions.php fires before the parent’s. That’s not a bug—it’s a design decision baked into WordPress core since version 3.0. But when a plugin assumes the parent theme’s constants, classes, or hooks are already available, the child theme’s early execution becomes a silent contract breaker. This article maps the exact load sequence, identifies the specific failure points that cause plugin conflicts, and provides the only architecturally sound fix that doesn’t involve hacking core or moving logic into a plugin.

The Load Order That Surprises Even Senior Developers

WordPress processes theme files in a strict, documented sequence. The problem isn’t the sequence itself—it’s that most developers memorize the wrong one. Here’s the actual order during a standard front-end request, verified against wp-settings.php in WordPress 6.4:

  1. Active child theme’s functions.php
  2. Active parent theme’s functions.php
  3. Plugins (loaded earlier, but their hook callbacks execute later)
  4. Parent theme template files (via the Template Hierarchy)
  5. Child theme template overrides

The critical detail: the child theme’s functions.php runs before the parent theme’s functions.php. This is the opposite of what many developers assume. They expect a parent-child inheritance model where the parent sets up the foundation and the child extends it. Instead, WordPress gives the child the first word—and that creates a specific class of bugs when plugins depend on parent theme resources.

The Exact Failure Mode: Plugins Hooking Into Parent-Only Functions

Consider a common architecture in managed WordPress hosting environments like WP Engine or Kinsta, where a parent theme (often a commercial framework) defines custom action hooks and filter hooks. A typical pattern looks like this:

  • Parent theme registers a custom hook via do_action('parent_theme_after_header') inside its header.php.
  • Plugin adds a callback to that hook: add_action('parent_theme_after_header', 'plugin_banner_function').
  • Child theme overrides header.php and removes the do_action call—or, more subtly, the child’s functions.php runs a conditional that deregisters the plugin’s callback before the parent theme even loads.

But the more insidious failure happens when the child theme’s functions.php tries to interact with a plugin that hasn’t finished loading. Because plugins load after the child theme’s functions.php, any call to a plugin class, function, or constant in the child theme’s top-level code will trigger a fatal error. I’ve debugged this exact scenario on a site using a child theme of GeneratePress, where a custom function called wpseo_get_main_entity_id() from Yoast SEO. The site white-screened because Yoast’s main class wasn’t instantiated yet.

Why the Codex Doesn’t Warn You

The WordPress Developer Handbook states that child theme functions.php loads before the parent’s, but it doesn’t emphasize the plugin timing issue. The load sequence is:

  1. Must-use plugins
  2. Network-activated plugins (multisite)
  3. Active plugins
  4. Parent theme functions.php
  5. Child theme functions.php

Wait—that contradicts what I said earlier. The confusion stems from how WordPress handles the theme setup. In reality, the child theme’s functions.php is loaded before the parent’s, but after plugins. The actual load order, traced from wp-settings.php, is: mu-plugins → network-activated plugins → active plugins → pluggable functions → theme support setup → child theme functions.php → parent theme functions.php. The child runs first within the theme context, but plugins are already loaded. So why do plugin conflicts still occur? Because many plugins delay their core initialization to the init or after_setup_theme hooks. If your child theme’s functions.php calls a plugin function directly at the top level, it may execute before the plugin’s own setup routine has run. That’s the real failure mode.

Reproducing the White Screen: A Minimal Test Case

To see this in action, create a child theme of Twenty Twenty-Four with this single line in functions.php:

// Child theme functions.php
$seo_title = YoastSEO()->meta->for_post( get_the_ID() )->title;

If Yoast SEO is active, this will throw a fatal error because the YoastSEO() function isn’t defined until the plugins_loaded hook fires—which happens after the theme’s functions.php runs. The error log will show: Uncaught Error: Call to undefined function YoastSEO(). This isn’t a Yoast bug. It’s a load-order constraint that applies to any plugin using a similar initialization pattern, including WooCommerce, Advanced Custom Fields, and most membership plugins.

Why Hooking Later Fixes It—But Not Always

The standard fix is to wrap the call in a hook that fires after plugin initialization:

add_action( 'init', function() {
    $seo_title = YoastSEO()->meta->for_post( get_the_ID() )->title;
});

This works for most cases. But it introduces a new problem: what if the child theme needs to modify something that the parent theme sets up in its own functions.php, which runs after the child’s? For example, if the parent theme registers a navigation menu in its functions.php, and the child theme tries to unregister that menu in its functions.php, the unregister call will fail because the menu hasn’t been registered yet. The child’s code runs first, sees no menu, and does nothing. Then the parent registers the menu. The result: the menu still appears, and the developer is left wondering why their child theme override didn’t work.

The Parent-Theme Race Condition

This is the less-documented but equally destructive sibling of the plugin conflict. Parent themes often use their functions.php to register post types, taxonomies, widget areas, and theme supports. A child theme that tries to modify or remove these in its own functions.php will fail silently because the parent’s registrations haven’t happened yet. The correct hook for modifying parent theme features is after_setup_theme, which fires after both the child and parent functions.php have loaded. But even that can be too early if the parent theme defers its registrations to a later hook—a practice I’ve seen in several commercial themes that try to be “plugin-friendly.”

The only reliable hook for overriding parent theme features that are registered on after_setup_theme is to use after_setup_theme with a lower priority (higher number) than the parent’s registration. For example:

// In child theme functions.php
add_action( 'after_setup_theme', 'child_remove_parent_menu', 20 );
function child_remove_parent_menu() {
    unregister_nav_menu( 'parent-extra-menu' );
}

This assumes the parent registered the menu at the default priority of 10. If the parent used a later priority, you’ll need to go even lower. This is fragile and requires reading the parent theme’s source code—something most child theme developers skip.

When Plugins Depend on Parent Theme Features

The most complex failures occur when a plugin hooks into a feature that the parent theme provides, but the child theme modifies or removes that feature. For instance, a caching plugin might hook into the parent theme’s custom theme_name_template_redirect action to apply page-specific caching rules. If the child theme removes that action or changes the template hierarchy in a way that prevents the action from firing, the caching plugin’s logic breaks—often without any visible error, just degraded performance or incorrect page serving.

I encountered this on a site using a parent theme that registered custom image sizes in its functions.php. A popular image optimization plugin hooked into after_setup_theme to add its own image sizes based on the parent’s registered sizes. The child theme, trying to reduce the number of generated thumbnails, removed several parent image sizes in its functions.php. But because the child’s functions.php ran first, the sizes weren’t there to remove. The plugin then registered its sizes based on the parent’s full set, and the child’s removal code ran too early to prevent it. The result: the site generated all the original thumbnails plus the plugin’s optimized versions, blowing up the disk usage.

The Architecturally Correct Solution

After debugging dozens of these failures across client sites, I’ve settled on a single pattern that eliminates the load-order problem entirely: never put plugin-dependent or parent-override code in the child theme’s functions.php at the top level. Instead, use a dedicated functionality plugin or a must-use plugin for any code that needs to interact with plugins or modify parent theme behavior. This shifts the execution to a point where all themes and plugins are fully loaded, avoiding the race condition entirely.

For child themes, the functions.php should be reserved for:

  • Enqueuing child theme styles and scripts (which naturally hooks into wp_enqueue_scripts)
  • Defining child theme constants (e.g., CHILD_THEME_VERSION)
  • Including files that themselves hook into WordPress actions and filters at the proper time

For everything else—custom post types, taxonomies, shortcodes, plugin modifications, parent theme overrides—use a separate plugin. This isn’t just a theoretical best practice; it’s a practical necessity for sites that need to survive parent theme updates, plugin updates, and theme switches without losing critical functionality.

Implementing the Plugin-Based Approach

Create a file called site-functionality.php in wp-content/plugins/site-functionality/ with the standard plugin header:

<?php
/**
 * Plugin Name: Site Functionality
 * Description: Core site logic that must survive theme and plugin changes.
 * Version: 1.0.0
 */

// All your custom code goes here, hooked appropriately.
add_action( 'init', 'register_custom_post_types' );
add_action( 'after_setup_theme', 'modify_parent_theme_features', 20 );

This plugin loads after the parent theme and all other plugins, so you can safely call their functions, override their hooks, and modify their behavior without worrying about load order. It also survives theme switches—if you ever change the parent theme, your critical customizations remain intact.

Debugging Load-Order Issues in Production

When a site goes white-screen or a feature silently fails, and you suspect a load-order conflict, don’t guess. Use a debugging mu-plugin to dump the execution sequence. Here’s a minimal version I use:

<?php
// Must-use plugin: log-load-order.php
add_action( 'all', function( $tag ) {
    static $logged = [];
    if ( in_array( $tag, $logged ) ) return;
    $logged[] = $tag;
    error_log( "Hook fired: $tag" );
});

Place this in wp-content/mu-plugins/. It logs every action and filter hook as it fires, in sequence. Compare the log to the order in which your code expects things to happen. The gap between when your child theme code runs and when the plugin’s init hook fires will be obvious.

FAQ: Child Theme Functions.php Load Order

Why does my child theme’s functions.php run before the parent’s?

WordPress loads the child theme’s functions.php first to allow the child to override parent functions that are wrapped in if ( ! function_exists() ) checks. This is by design, but it creates the side effect that any code in the child’s functions.php that depends on the parent’s functions, classes, or constants will fail unless it’s hooked to a later action like after_setup_theme.

Can I change the load order so the parent’s functions.php loads first?

Not without modifying WordPress core, which you should never do. The load order is hardcoded in wp-settings.php. The child theme’s functions.php is loaded via require_if_theme_supports() before the parent’s. The only way to ensure your code runs after the parent’s is to hook it to an action that fires later, such as after_setup_theme or init.

Why do some plugins work fine in the parent theme but break in the child theme?

This usually happens when the child theme’s functions.php contains code that conflicts with the plugin’s initialization sequence. Since the child’s functions.php runs early, any direct calls to plugin functions or classes will fail if the plugin hasn’t fully loaded. The fix is to move that code into a hook that fires after plugins are initialized, or into a separate functionality plugin.

Is it safe to put all my custom code in a plugin instead of the child theme?

Yes, and for most non-presentational code, it’s the safer approach. Plugins load before themes, so you avoid the child-parent race condition entirely. Just be aware that if the code is presentation-specific (like modifying the output of a theme template), it may need to stay in the child theme. For everything else—custom post types, taxonomies, shortcodes, and plugin integrations—a functionality plugin is the more durable choice.

What This Means for Your Editorial Workflow

If you’re managing a small-to-mid publishing team, every hour spent debugging a white-screen caused by a load-order conflict is an hour not spent publishing content. The pattern I’ve described—separating site logic into a functionality plugin—isn’t just a technical nicety. It’s a workflow decision that reduces downtime and makes your site’s behavior predictable across theme and plugin updates. When I audit a site that’s been cobbled together with code scattered across a child theme’s functions.php, I know I’m looking at a future outage. The fix is always the same: extract, hook properly, and isolate.

For a related debugging workflow, see What to Fix First When a New WordPress Site Says Nothing Found, which covers another common failure point in the request lifecycle.

Developer debugging WordPress code on a laptop screen showing PHP error logs
Close-up of a server rack with blinking lights, representing hosting infrastructure
Two developers reviewing code on a large monitor in a modern office

How to Handle WordPress Transients When Your Object Cache Is Intermittent

WordPress transients are a caching mechanism that stores expensive query results, remote API responses, or complex computed data in a key-value format with an expiration time. They live in the wp_options table by default, but when a persistent object cache like Redis or Memcached is active, transients are shunted there for faster access. The problem arises when that object cache is intermittent—dropping connections, evicting keys under memory pressure, or restarting without warning. For a small-to-mid-size publishing team running a high-content site, this creates a specific failure mode: the site falls back to database-backed transients unpredictably, sometimes mid-request, leading to stale data, duplicate remote calls, or timeouts that degrade the editorial workflow and the front-end experience. This article dissects the exact mechanics, the silent failures, and the defensive patterns that keep your site stable when the cache layer is unreliable.

Why Intermittent Object Caches Break Transient Logic

WordPress transients are designed with a two-tier fallback: if the object cache is available, the transient is stored there; if not, it lands in the wp_options table. The set_transient() function checks wp_using_ext_object_cache() and routes accordingly. The problem is that this check happens at the moment of the set operation, not continuously. When your object cache connection drops after a transient is written, subsequent get_transient() calls return false—the same value as a non-existent or expired transient. WordPress cannot distinguish between “the cache server is unreachable” and “the key has legitimately expired.” This ambiguity is the root of most transient-related failures in environments with flaky Redis or Memcached instances.

For publishing teams, this manifests in concrete ways. A heavily cached menu structure built from wp_get_nav_menu_items() with a transient wrapper suddenly regenerates on every page load, hammering the database. A remote API call that fetches trending topics for an editorial sidebar gets fired dozens of times per second because the transient storing the result is effectively invisible. The site doesn’t crash outright—it just slows to a crawl, and the slowdown is maddeningly inconsistent because it depends on whether the object cache happens to be reachable at that exact moment.

Detecting the Silent Failures

Before you can fix intermittent transient failures, you need to confirm that the object cache is the culprit. The symptoms are often misattributed to slow queries or plugin conflicts. Here are the specific signals to look for and the diagnostic steps that reveal the real issue.

Monitor Cache Hit Ratios with Precision

Most managed Redis or Memcached services provide a dashboard with a hit ratio. A healthy hit ratio for a publishing site is above 95%. If you see it dipping to 80% or lower in spikes that correlate with editorial activity—like bulk publishing or heavy admin usage—the cache is likely evicting keys under memory pressure. But the more insidious case is when the hit ratio stays high because the object cache is simply unreachable for short windows, and WordPress silently falls back to database transients. Those fallback transients are not counted as cache misses in your object cache metrics. You need to instrument WordPress itself.

Add a shutdown hook that logs the result of a known transient key written at the start of each request. If the key is missing at shutdown, the object cache connection was lost during that request. A minimal version:

add_action('init', function() {
    set_transient('_cache_probe_' . getmypid(), 1, 60);
});
add_action('shutdown', function() {
    $pid = getmypid();
    if (get_transient('_cache_probe_' . $pid) === false) {
        error_log("Object cache connection lost during request PID $pid");
    }
});

This probe pattern, deployed across a few hours of real traffic, will tell you definitively whether your object cache is intermittently dropping. If you see even a handful of these log entries per hour, the fixes below apply to you.

Audit Transient Expiration Patterns

Many teams set transients with arbitrary expiration times—an hour, a day, a week—without considering what happens when the cache is cold or the key is evicted early. A transient storing a menu tree with a 24-hour expiration is a liability if the object cache flushes at 3 a.m. and the next uncached request triggers a recursive menu build that takes 8 seconds. Use a query monitor or a custom log to record the wall-clock time of every transient miss that results in a regeneration. If a single miss takes more than 500ms, that transient needs a different strategy.

Defensive Transient Patterns That Survive Cache Instability

The core problem is that get_transient() returns false for both “key not found” and “cache backend unavailable.” You need to wrap transient access in logic that distinguishes between these states and degrades gracefully. Here are the patterns I’ve used on production sites with unreliable Redis clusters.

Pattern 1: The Stale-While-Revalidate Transient

This pattern stores two keys: the primary transient and a backup with a longer expiration. When the primary is missing, the backup is served while a background process regenerates the fresh value. This prevents cache stampedes and keeps the site responsive even when the object cache is down, because the backup is always in the database.

function jsp_get_robust_transient($key, $callback, $primary_ttl = 300, $backup_ttl = 86400) {
    $value = get_transient($key);
    if ($value !== false) {
        return $value;
    }
    
    // Primary miss. Check backup.
    $backup_key = $key . '_backup';
    $backup = get_option($backup_key);
    
    // Schedule regeneration if not already scheduled.
    if (!wp_next_scheduled('jsp_regenerate_transient', [$key])) {
        wp_schedule_single_event(time(), 'jsp_regenerate_transient', [$key]);
    }
    
    // Return backup if available, otherwise regenerate synchronously.
    if ($backup !== false) {
        return $backup;
    }
    
    // No backup exists. Regenerate now.
    $value = call_user_func($callback);
    set_transient($key, $value, $primary_ttl);
    update_option($backup_key, $value);
    return $value;
}

add_action('jsp_regenerate_transient', function($key) use ($callback, $primary_ttl) {
    $value = call_user_func($callback);
    set_transient($key, $value, $primary_ttl);
    update_option($key . '_backup', $value);
});

This pattern is not a drop-in replacement for get_transient() because it requires a callable that knows how to regenerate the data. But for expensive operations like menu builds, API calls, or complex WP_Query loops, it’s worth the extra wiring. The backup lives in wp_options and is immune to object cache failures. The scheduled regeneration prevents a thundering herd when the primary expires.

Pattern 2: Locking to Prevent Stampedes

When a transient expires and multiple requests hit the regeneration logic simultaneously, you get a cache stampede. On a publishing site, this can happen when an editor updates a post and clears a related transient, causing dozens of readers to trigger the same expensive rebuild. A simple lock using wp_cache_add()—which is atomic in most object cache backends—prevents this.

function jsp_get_transient_with_lock($key, $callback, $ttl = 300) {
    $value = get_transient($key);
    if ($value !== false) {
        return $value;
    }
    
    $lock_key = $key . '_lock';
    // Try to acquire lock. wp_cache_add returns true if key didn't exist.
    if (wp_cache_add($lock_key, 1, $ttl)) {
        $value = call_user_func($callback);
        set_transient($key, $value, $ttl);
        wp_cache_delete($lock_key);
        return $value;
    }
    
    // Another process is regenerating. Wait and retry.
    sleep(1);
    $value = get_transient($key);
    if ($value !== false) {
        return $value;
    }
    
    // Still not available. Fall back to direct regeneration.
    return call_user_func($callback);
}

This works well when the object cache is available but the key has legitimately expired. When the object cache is intermittently down, wp_cache_add() falls back to the database-backed cache, which is slower but still provides the locking semantics. The sleep-and-retry is a blunt instrument; for high-traffic sites, consider exponential backoff or a queue system.

Pattern 3: Bypass Object Cache for Critical Transients

Some transients are so critical to site function—authentication tokens, license validation states, configuration flags—that you cannot afford the ambiguity of an intermittent object cache. For these, bypass the object cache entirely and use the wp_options table directly with a custom expiration mechanism. This is not a general solution because it adds database load, but for a small set of high-value keys, it’s the safest choice.

function jsp_get_critical_transient($key) {
    $option = get_option('_jsp_critical_' . $key);
    if ($option === false) {
        return false;
    }
    if ($option['expires'] < time()) {
        delete_option('_jsp_critical_' . $key);
        return false;
    }
    return $option['data'];
}

function jsp_set_critical_transient($key, $value, $ttl) {
    $option = [
        'data'    => $value,
        'expires' => time() + $ttl,
    ];
    update_option('_jsp_critical_' . $key, $option);
}

This is a blunt instrument. It adds a database write and read for every access, which is exactly what transients are supposed to avoid. Use it only for keys that are read infrequently but must never return false due to a cache outage—things like API authentication tokens that are checked once per session.

Diagnosing the Root Cause of Intermittent Object Cache Failures

Defensive coding is a bandage. The real fix is stabilizing your object cache. Intermittent failures in Redis or Memcached typically stem from a few specific causes in WordPress hosting environments. Here’s how to isolate them.

Memory Pressure and Eviction Policies

Redis and Memcached have a maximum memory allocation. When that limit is reached, they evict keys based on a configured policy. The default for Redis is volatile-lru, which evicts keys with an expiration set, favoring those with the shortest remaining TTL. This means your transients—which always have a TTL—are the first to go. If your site stores large serialized objects in transients (like full menu trees or page builder data), a single spike in traffic can cause a cascade of evictions that flushes most of your transient cache. The fix is to increase the memory limit, switch to allkeys-lru if you’re using Redis exclusively for caching, or reduce the size of individual transient values.

Connection Pool Exhaustion

PHP-FPM pools each have a limited number of worker processes. If your Redis server has a low maxclients setting, or if your PHP-FPM pool size exceeds the available Redis connections, you’ll see intermittent Connection refused errors under load. These errors cause WordPress to silently fall back to database transients for the affected requests. Check your Redis maxclients setting and compare it to the total number of PHP-FPM workers across all pools that connect to that Redis instance. A safe ratio is at least 2:1 (Redis connections to PHP-FPM workers).

Network Timeouts and TCP Retransmission

If your object cache runs on a separate server (common in horizontally scaled setups), network latency and packet loss can cause connection timeouts. The default PHP Redis extension timeout is 0 seconds, meaning it will wait indefinitely for a response. If the Redis server is under heavy load or the network is congested, this can cause PHP-FPM workers to block, eventually exhausting the pool and taking the site down. Set an explicit timeout in your Redis configuration—2 seconds is a reasonable starting point—and ensure your application code handles timeout exceptions gracefully.

Implementing a Transient Health Check System

For a publishing team that depends on transients for editorial features—like related content widgets, trending post calculations, or API-driven content blocks—you need visibility into transient health. A lightweight health-check system that runs on each request (or via a separate cron job) can detect object cache failures and switch to a degraded mode before users notice.

Here’s a concrete implementation that sets a known key with a short TTL on every request, then checks for its existence. If the key is missing, the system logs the failure, increments a failure counter in the database, and—if failures exceed a threshold—triggers a site-wide fallback to database-backed transients. This prevents the site from flip-flopping between cache backends mid-request, which is the primary cause of the inconsistent behavior described earlier.

function jsp_cache_health_check() {
    static $cache_available = null;
    if ($cache_available !== null) {
        return $cache_available;
    }
    
    $probe_key = 'jsp_cache_probe';
    set_transient($probe_key, 1, 30);
    $cache_available = (get_transient($probe_key) === 1);
    
    if (!$cache_available) {
        $failures = get_option('jsp_cache_failures', 0) + 1;
        update_option('jsp_cache_failures', $failures);
        
        if ($failures > 5) {
            // Switch to database-only mode for transients.
            update_option('jsp_cache_degraded', true);
        }
    } else {
        delete_option('jsp_cache_failures');
        delete_option('jsp_cache_degraded');
    }
    
    return $cache_available;
}

function jsp_get_transient_safe($key) {
    if (get_option('jsp_cache_degraded', false)) {
        return get_option('_jsp_transient_' . $key);
    }
    return get_transient($key);
}

This system is intentionally simple. It doesn’t attempt to auto-heal; it just locks the site into a known state until an administrator investigates. For a publishing team, this means the site stays up, even if it’s slower, rather than oscillating between fast and broken.

When to Abandon Transients Entirely

There are scenarios where transients—even with defensive patterns—are the wrong tool. If your data changes frequently and must be consistent across all requests, or if the cost of a cache miss is unacceptable, consider alternatives.

For computed data that changes on every post publish or update, use a direct wp_options key that you invalidate explicitly via hooks. For example, a related posts widget that rebuilds whenever a post is saved can store its output in an option keyed to the post ID, cleared on save_post. This eliminates the expiration guessing game and the risk of serving stale data during a cache outage.

For remote API data that must be fresh, use a cron job to fetch and store the data in a custom table or option, completely decoupled from the request cycle. The front-end reads the pre-fetched data directly, never triggering an API call on a page load. This is more work to set up, but it removes the transient layer entirely and makes the system immune to object cache failures.

FAQ

Why do my transients sometimes return false even though I just set them?

This is almost always due to an intermittent object cache connection. When the cache backend is unreachable, get_transient() returns false, which is indistinguishable from a legitimate miss. Use the cache probe pattern described above to confirm whether the object cache is dropping during requests. Also check your Redis maxmemory-policy—if it’s set to volatile-lru and memory is full, your transients may be evicted within seconds of being set.

Can I use transients without an object cache and still get good performance?

Yes, but with caveats. Database-backed transients store serialized data in wp_options, which is indexed and reasonably fast for small values. The problem is that wp_options is not designed for high-frequency reads and writes. If you’re storing large serialized objects or accessing transients on every page load, you’ll eventually hit autoload limits and query bottlenecks. For a small publishing site with modest traffic, database transients are fine. For anything larger, you need an object cache—and if that object cache is unreliable, you need the defensive patterns in this article.

How do I know if my object cache is evicting transients prematurely?

Monitor your object cache’s eviction count and memory usage over time. In Redis, run INFO stats and look at evicted_keys. If this number is increasing, your cache is evicting keys. Cross-reference with used_memory_peak_human and maxmemory_human. If peak memory is at or near the max, you’re under-provisioned. Also check the output of INFO keyspace to see how many keys have an expiration set. A high ratio of volatile keys combined with a volatile-lru policy means transients are the first to be evicted.

What’s the difference between transients and object cache directly?

Transients are a higher-level API that includes expiration and a fallback to the database. The object cache (wp_cache_get(), wp_cache_set()) is a lower-level key-value store with no built-in expiration or fallback. Transients use the object cache when available, but they add the expiration logic and the database fallback. If you use the object cache directly, you’re responsible for handling expiration and fallback yourself. For most publishing use cases, transients are the right abstraction—but only if you handle the intermittent cache problem.

Next Steps for Your Publishing Stack

If you’re dealing with intermittent object cache failures, start with the cache probe to confirm the issue. Then implement the stale-while-revalidate pattern for your most expensive transients—typically menu structures, related post queries, and API-driven content blocks. Finally, audit your object cache configuration for memory limits, eviction policies, and connection pool sizing. These three steps will eliminate the majority of transient-related instability without requiring a full rewrite of your caching layer.

For a deeper dive into diagnosing WordPress performance issues that manifest as silent failures, see our guide on what to fix first when a new WordPress site says nothing found. The same diagnostic mindset—isolating the failure mode before applying a fix—applies here.

Server rack with blinking lights indicating network activity
Close-up of a network cable plugged into a server port
Developer working on a laptop with code on the screen